
Stereo photography to go — from start to finish in 3 minutes
Creating side by side stereo photos entirely on your smartphone
written for the stereosite by Pascal Martiné, Germany
Introduction
Many stereo photographers — especially those who are about to start with the medium — will at some point encounter problems when taking sequential stereo photos with their smartphone. This could be the wrong distance or rotation between the left and right image, the hassle of transferring the images to a computer for post-processing, automatic size reduction by collage apps, etc. There are common solutions and guides available for most of these single steps but this puzzle might get confusing or even frustrating for some. So better to switch to a stereo camera or build a stereo rig even if it’s expensive, heavy, and not always with me?
Personally, I really enjoy taking stereo photos of moving scenes with my Canon rig. But most opportunities are not worth taking the large bag with me and I also don’t have enough experience to make full use of all settings of the cameras. That’s why I actually hardly used my rig for almost two years. In fact, I’ve only used my smartphone and I definitely am convinced that this is a good choice — even for those who want to take stereoscopy more seriously.
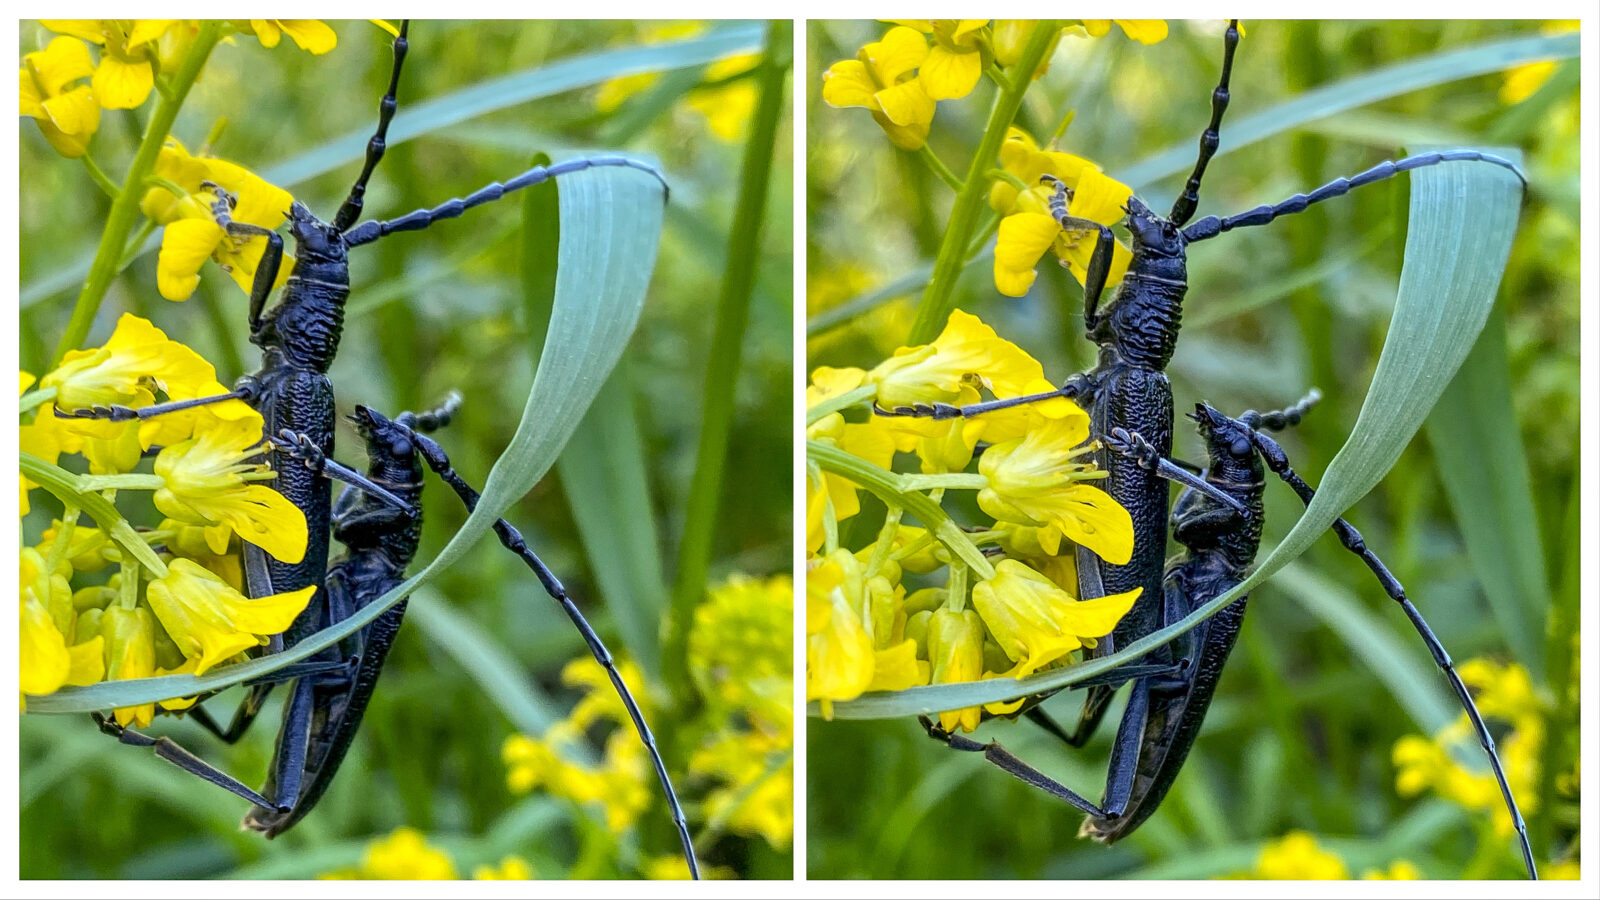
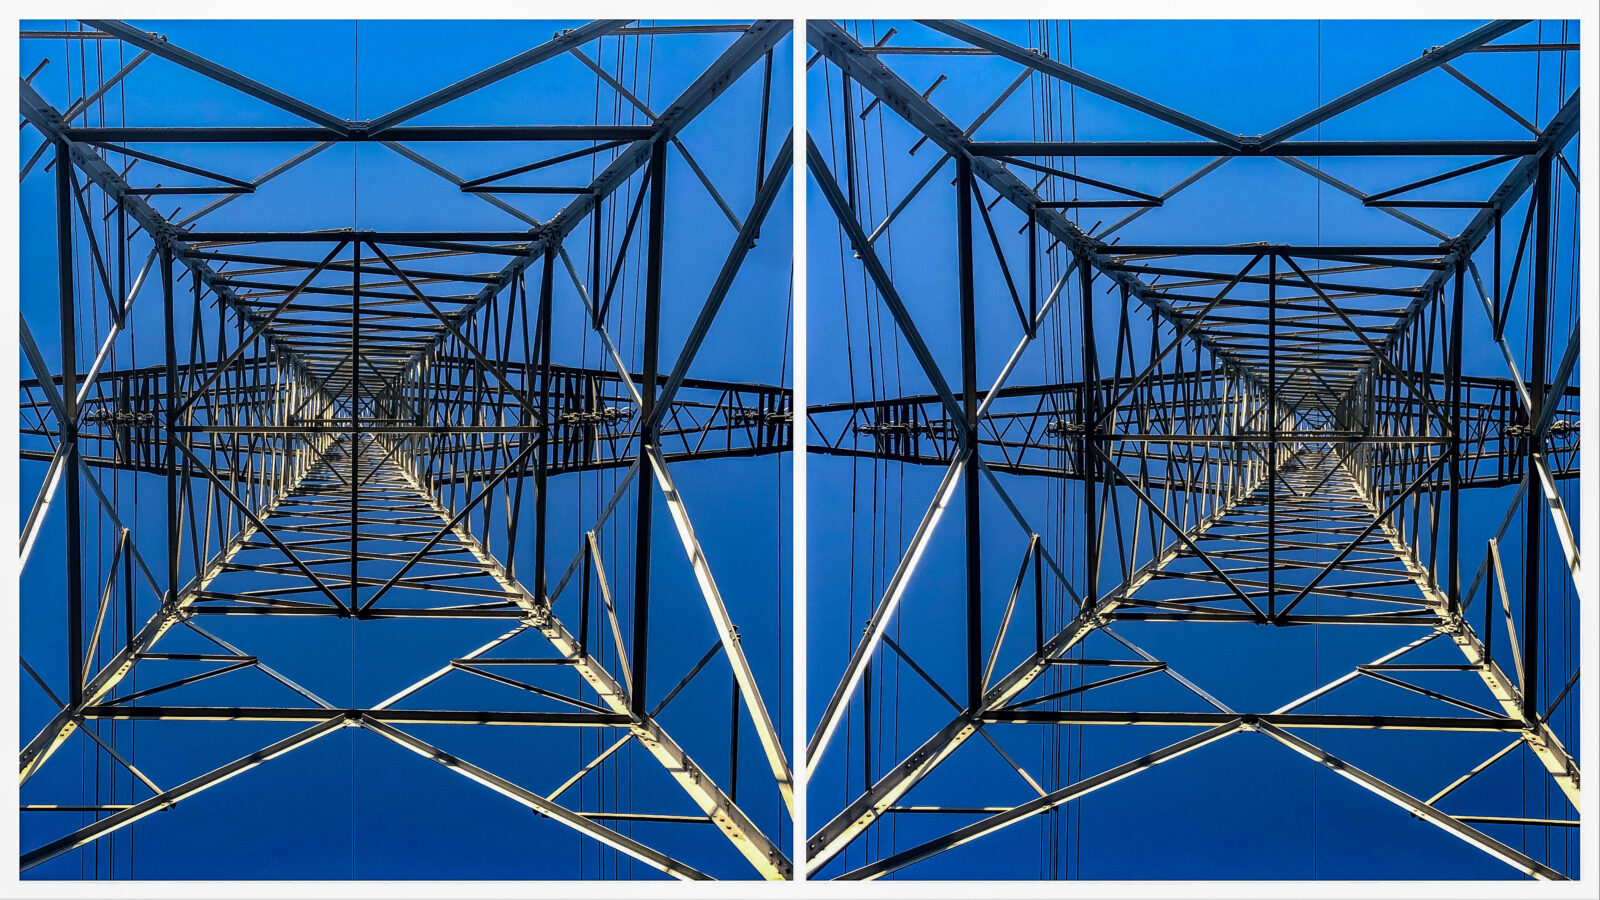
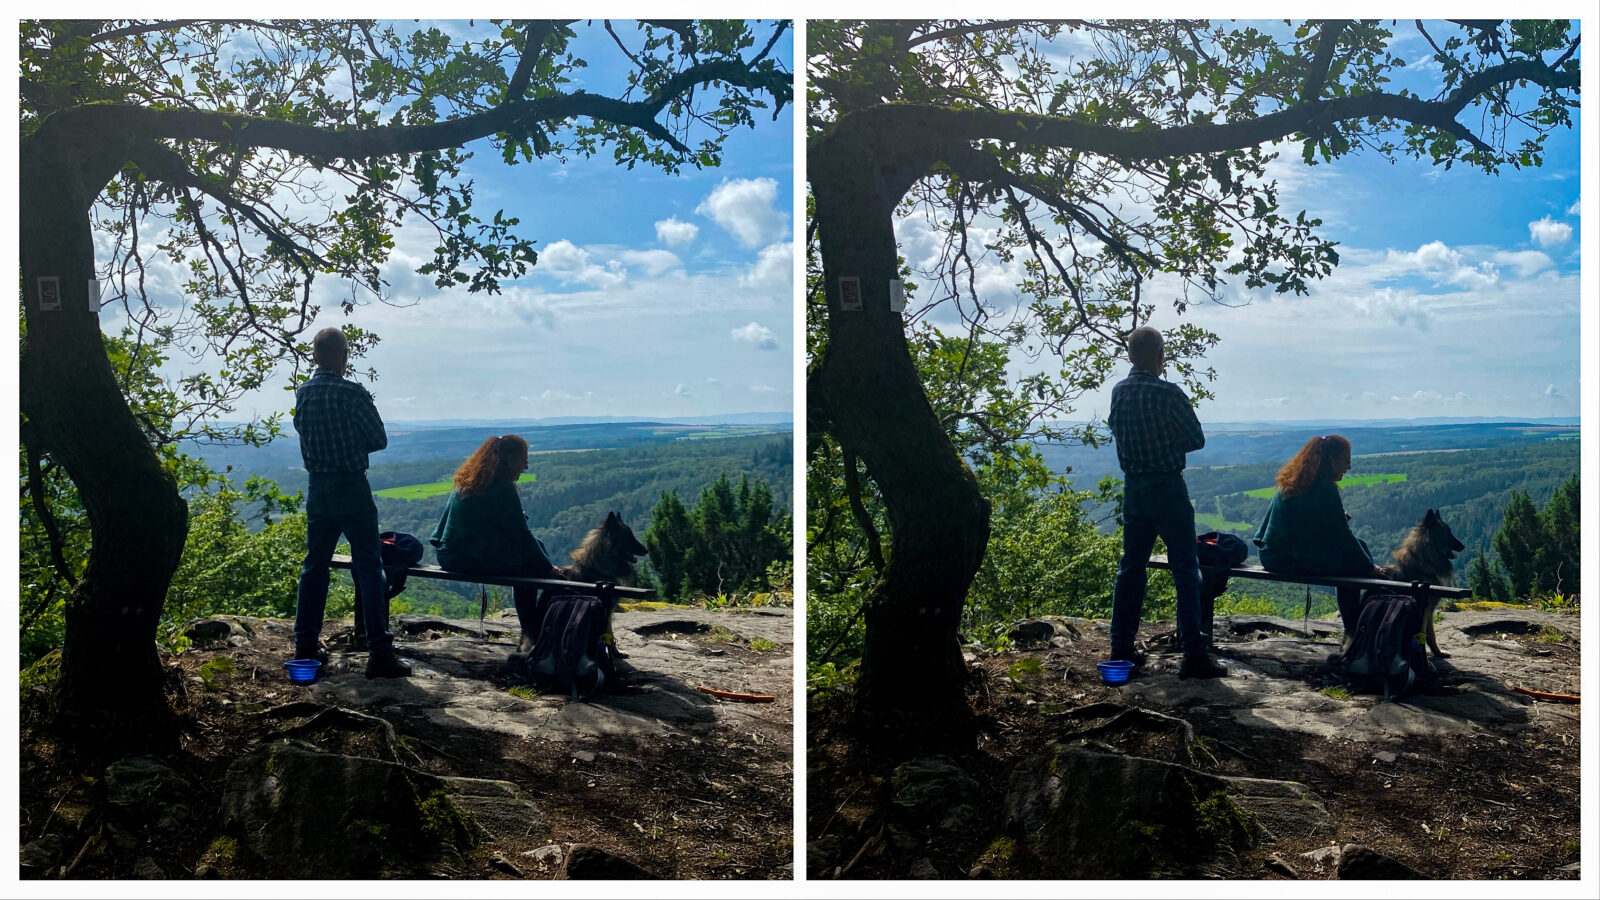
Here are some examples of stereo photos taken at unexpected occasions. Luckily, I have my smartphone always with me.

Preliminary remarks
This tutorial is based on my personal workflow for creating side-by-side stereos and includes several apps for taking, aligning, combining, and post-processing stereophotos. From shot to post, all files stay entirely on the smartphone. Depending on the occasion I slightly modify my workflow by adding, replacing, or skipping particular steps. But on average the process really comes down to 3 minutes to get a finished side-by-side stereophoto. It needs a little practice of course, but in the end it’s neither more complicated nor more time consuming than finalizing the shots that I took with my rig. Using a ready-built stereo camera might be easier, but I did not try one of those because of the limitations of a fixed baseline.
That said, I’m using an iPhone 11 Pro and so my experiences are iOS-based. But all the apps I’m using are available for Android as well and should work quite similarly. The same goes for standard editing operations like cropping or duplicating images in your photos/gallery app. More recently, I started using Apple shortcuts to automate certain steps. But indeed, this doesn’t seem to be possible on Android. Therefore, in addition to providing the ready-to-use Apple shortcut, I will also explain the individual steps involved.
If anyone could provide detailed remarks on Android, I will be glad to update this tutorial later.

1: Taking the photos
As you might already know, the baseline (i.e. the horizontal shifting) between the left and right image is crucial for the depth and cannot be changed afterwards. Therefore, I recommend David Kuntz’s article about finding the right baseline for a stereo photo.
For now, what I want to take away from it is to always take 3–5 photos in a sequence instead of only two. That way, you will have multiple stereo pairs with different baselines. No matter if you are experienced or a stereo beginner, you will always have at least one pair with the right depth. Furthermore, if you have two or more pairs with satisfying depth you may be able to sort out those with rivalries (i.e. movements or differences between the two shots that cause flickering in a stereo view). Finally, this method gives you also a kind of certainty while you take your photos: instead of thinking about the right baseline you can focus on a calm and relaxed parallel camera movement during your sequence and this will surely result in better aligned photos (although possible, correcting the alignment is limited and causes cropping of your images).
In addition, I want to recommend always rotating your camera to shoot in landscape format. Keep in mind while choosing your point of view that the aspect ratio of your final stereo image may not be landscape, but sticking to landscape format ensures that later on you will be able to adjust the stereo window more easily. As this suggests, stereo photography includes cropping in most cases. You may be tempted to shoot in upright orientation, especially when you want to take quick snapshots in 3D, but you will lose more material than if you shoot in landscape format. The only exception I would note is an extremely narrow image format.
So, after a short while you will end up with hundreds of photos on your camera roll ready to make you despair. Thus, the next step takes the most patience in the whole process.
2: Finding the stereo pairs
Surely you have heard of the software Stereo Photo Maker and the corresponding mobile apps i3DStereoid (or 3DStereoid for Android) which we will use now. It is not possible to save files with the free version but I can promise you it’s worth every cent. Even though they’re sometimes a bit cumbersome to use, developer Masuji Suto deserves lots of recognition for developing multiple stereo apps independently in his spare time.
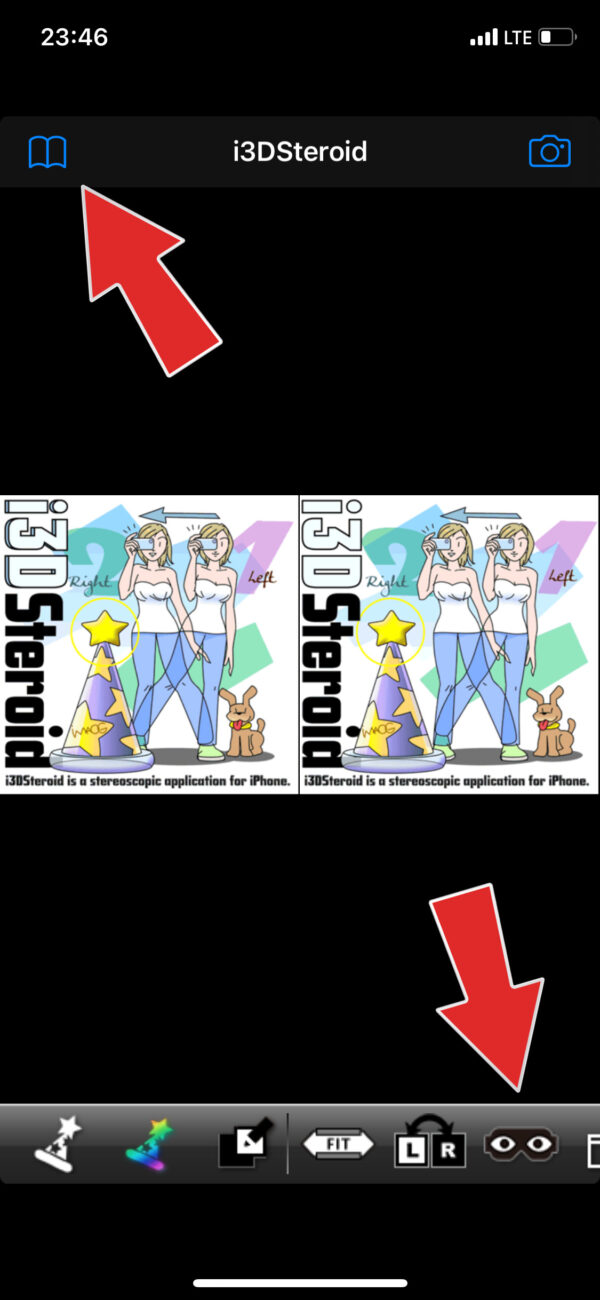
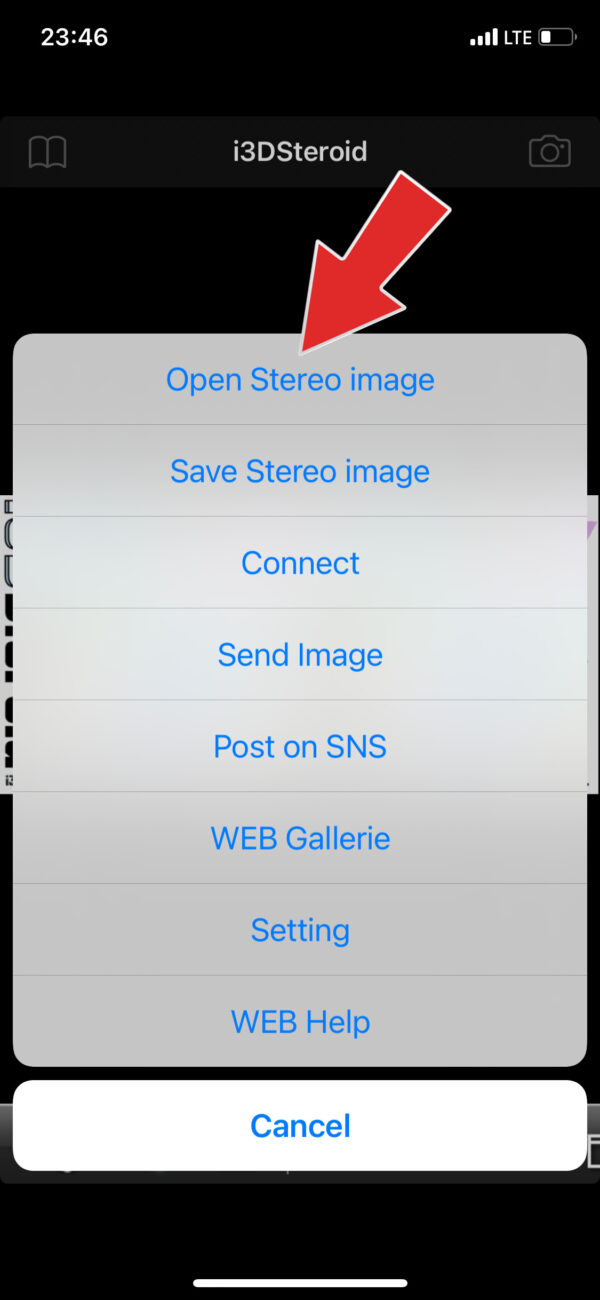
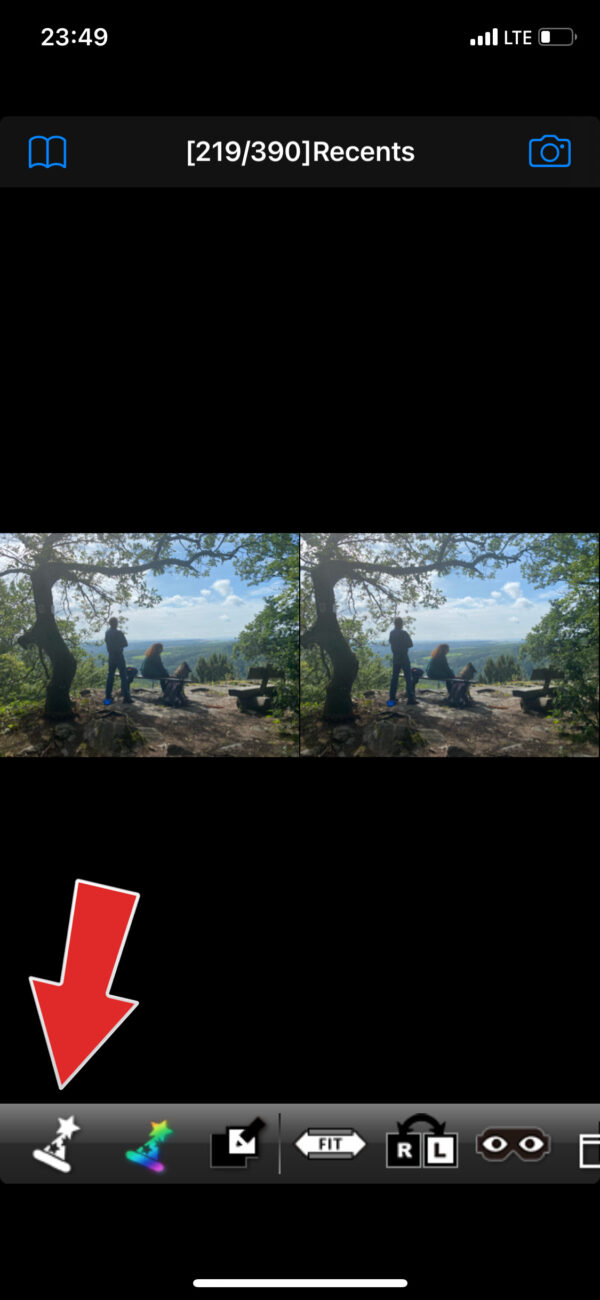
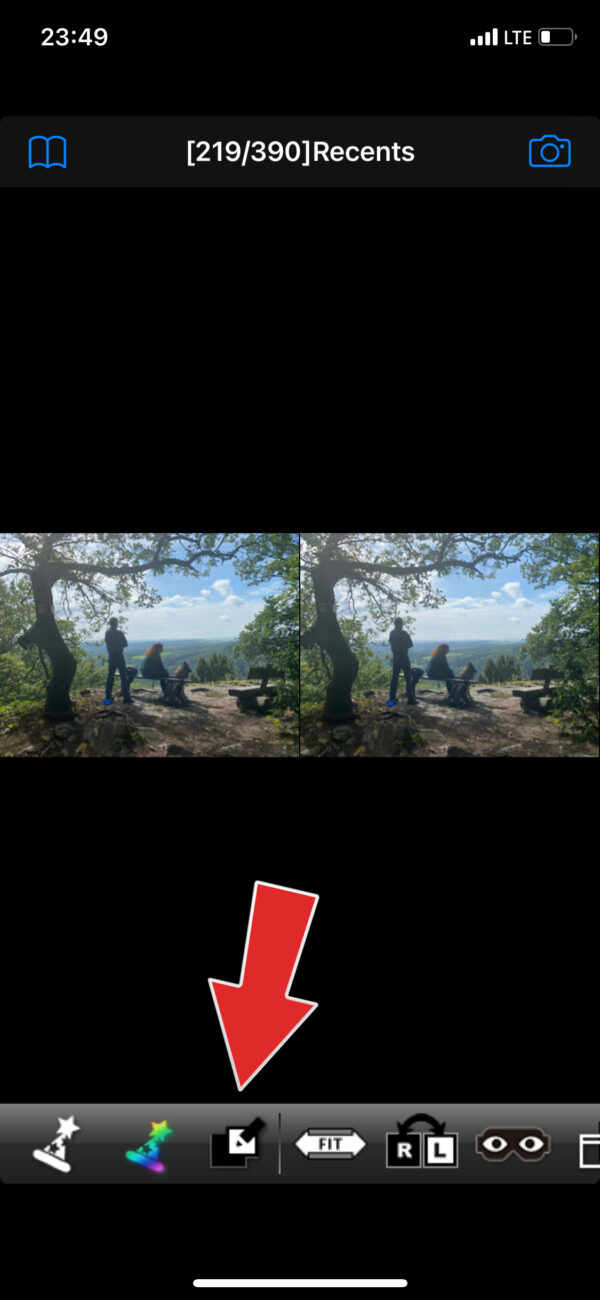
There are different tutorials and guides available for the app (iPhone-help, Android-help) where every function is explained in detail. Therefore, I will only explain the steps that are essential for this tutorial. I always use parallel view because that allows you to use a viewer or print cards. This tutorial works likewise for cross view, but if you want to use this or other different viewing methods, the later steps need to be modified. When first using the app, please set up for parallel or cross view in the bottom menu by tapping the eye-icon. As long as you want to follow this tutorial completely, you cannot use the frame feature. Tap on the ‘Main Menu’ button on the top left corner and choose ‘Open Stereo Image’ and navigate to your photos. Unfortunately, i3DStereoid won’t remember the last used folder so you will have to do this every time. There is a feature for easy flipping to the next image but it’s not suitable for our purpose.
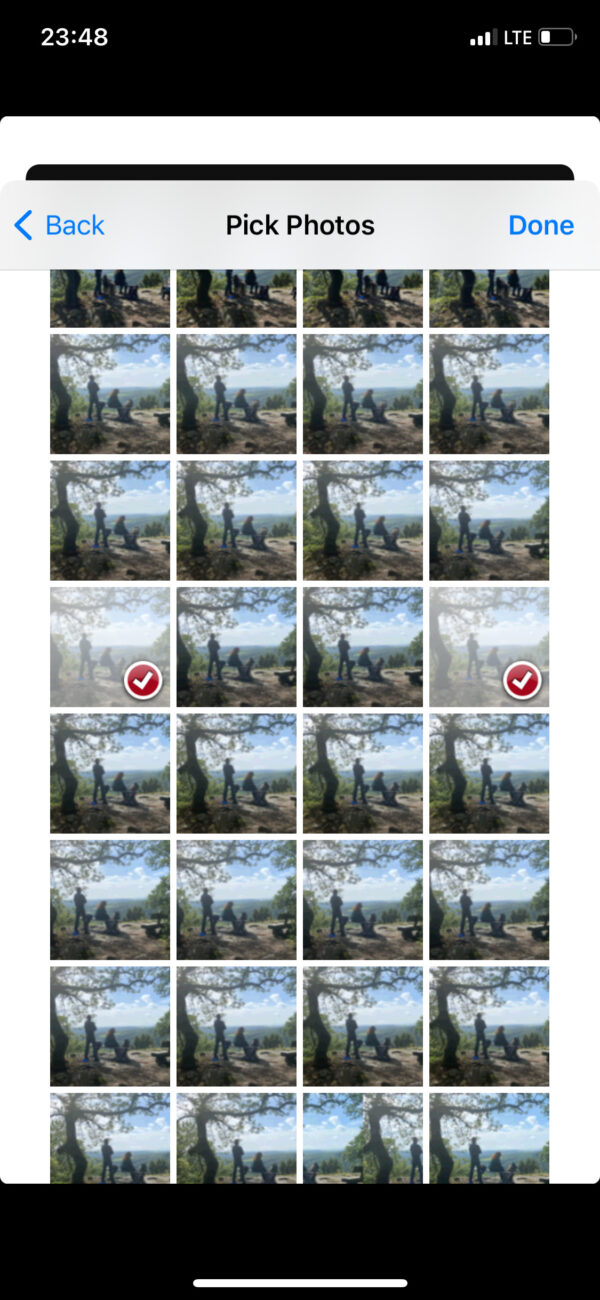
Now you have to select two photos. You can do this by trial and error and improve with experience. But you can also free view the thumbnail images in different ways: you can fuse adjacent images, or every other image, or every two images, depending on the grid, though this will require a little more practice. Depending on the direction of your photo sequence the resulting stereo view will be either normal or inverted. But fortunately, either way lets you estimate the amount of depth of the stereopair and therefore helps you to choose the right one more quickly. Keep in mind that stereo photos look shallower at thumbnail size and will look deeper at full size. After you have determined the pair with the best depth you can now proceed as normal. Tapping on the ‘L‑R’ icon switches the two photos so that you can change between parallel and cross view.
3: Aligning the stereo pair
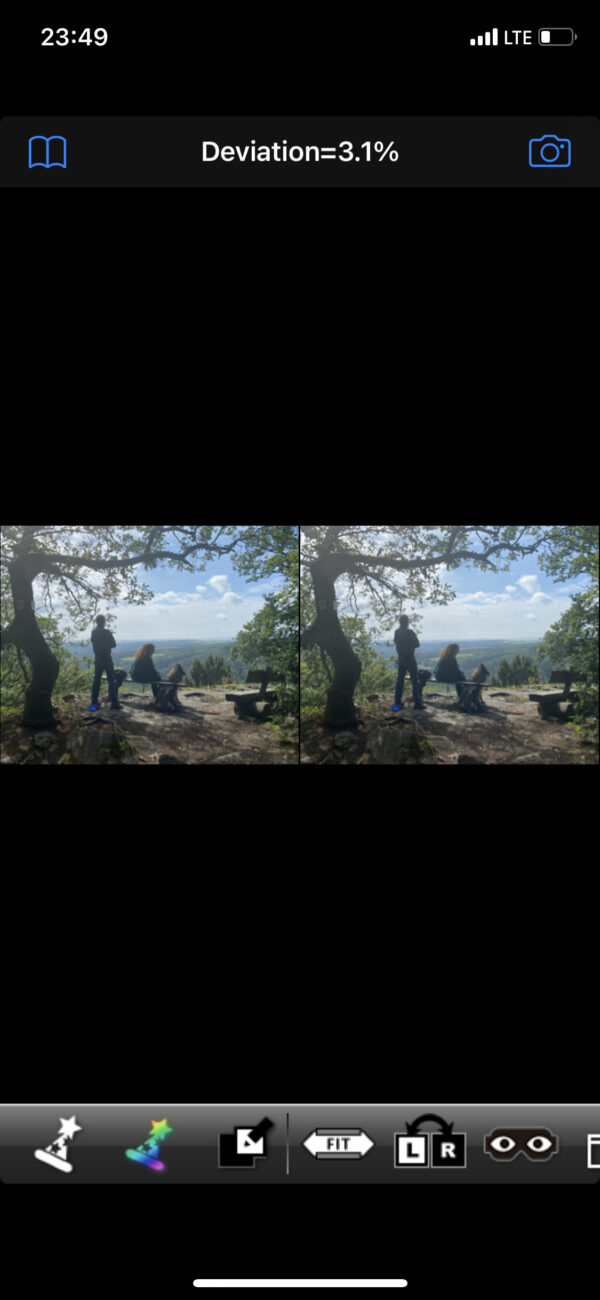
Without a bracket to guide the movement of your camera, it’s almost impossible to prevent vertical camera movement or rotation between the left and the right images. This makes it difficult or impossible to view the stereo photo, even with a viewer. Luckily, i3DStereoid has an amazing auto-alignment feature: just tap the white magician’s hat on the bottom menu and you are done.

Optional step: color adjustment
Sometimes the colors between the left and the right image are different due to the autofocus of your smartphone. More recently, i3DStereoid got a second magician’s hat (the colorful one). Tapping on it will adjust the colors of the two images to match better. If you tap once, the left image becomes the color reference; if you tap twice, the right image becomes the color reference; if you tap three times, all changes will be undone.
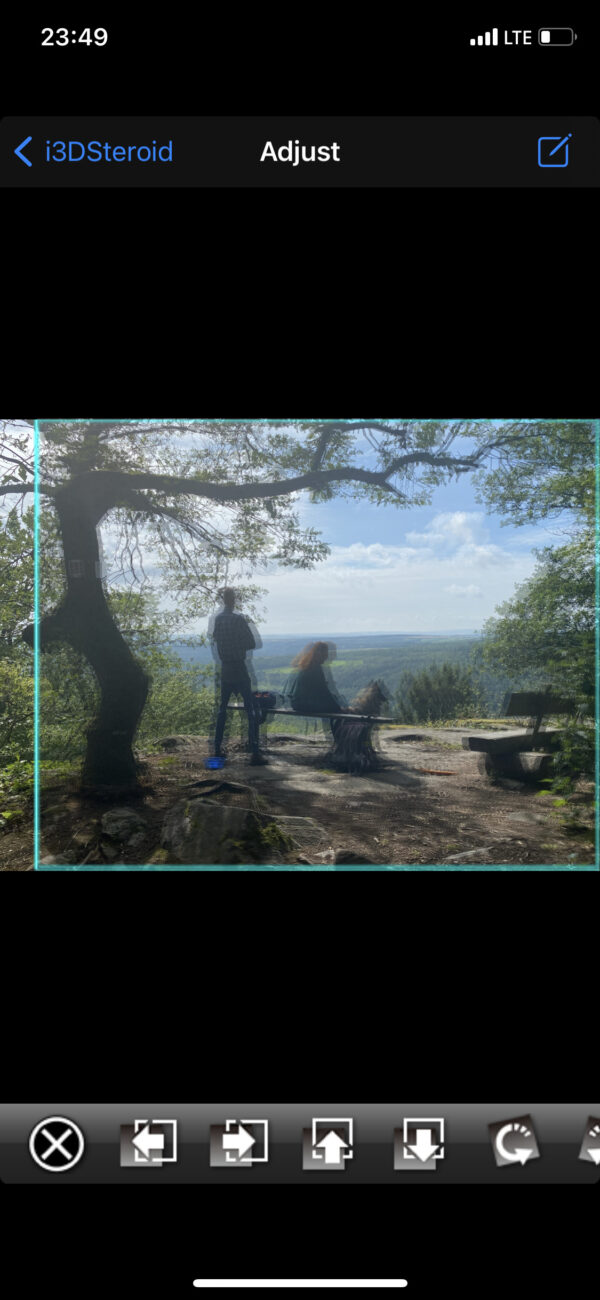
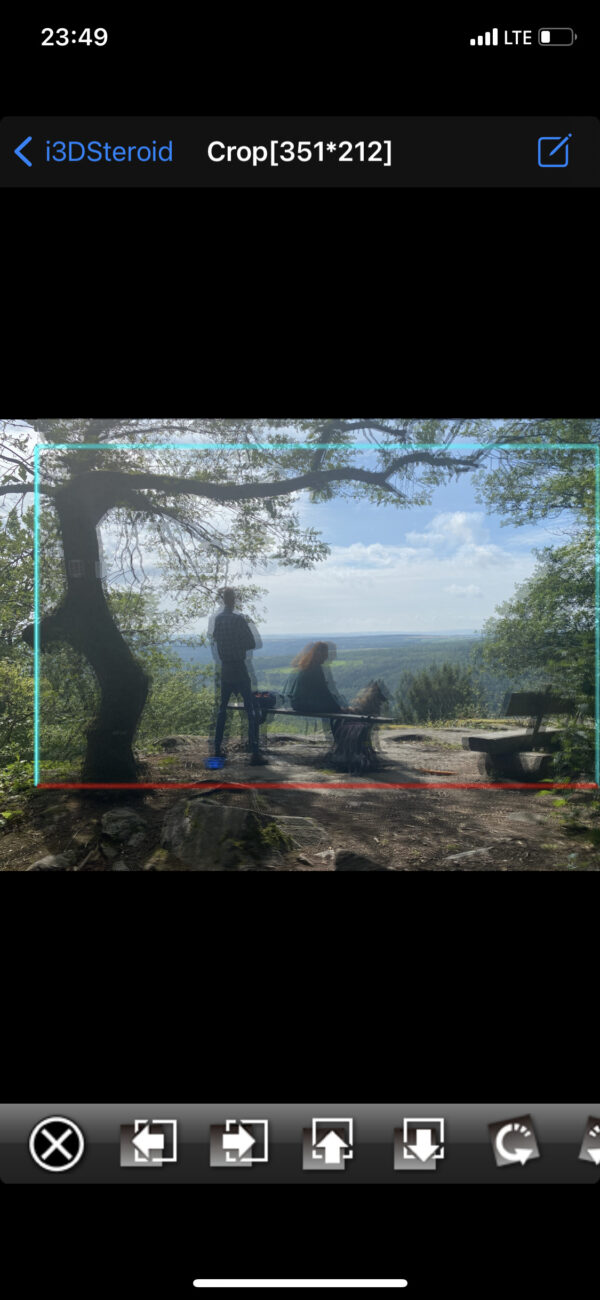
Optional step: vertical cropping
Although I’ve spent a few sentences on how to reduce the need for cropping, there are some cases that require additional cropping, e.g. if you simply want to remove something from the top or the bottom of the photo.
I have to add that I personally prefer my stereo photos to all have the same aspect ratio, be it displaying them in a grid, or for printing them. Surely if you only want to display them on social media like Instagram different aspect ratios won’t matter that much. But if you want to keep a fixed aspect ratio, it is necessary that we crop only vertically in this step, or at least that we crop in a way that the result will still have a wide format.
The third icon on the bottom menu opens the ‘Adjust mode’. The stereopair is displayed interlaced and a blue cropping frame is displayed. You can adjust the frame easily with your hands.
Note about the stereo window
Let me take the opportunity to drop a few lines about the so-called stereo window here because that will be the next step we are about to prepare. The stereo window is created by the borders of your left and right images. In addition, their horizontal alignment will create a depth relation between the borders and the stereo photo. In other words, by adjusting the stereo window you determine if your subject is at the level of your screen, lies behind, or even pops out. Like the baseline, the stereo window is essential for a good stereophoto; however, unlike with the baseline, the position of the stereo window can always be corrected later. I highly recommend David Kuntz’s article on that topic to ensure you know how to achieve the desired effect and prevent a so-called window violation.
It is just as possible to adjust the stereo window in the ‘Adjust Mode’ of i3DStereoid. But since we have to switch to another app at some point anyway, I personally prefer adjusting the stereo window later. In particular, that is because I want to immediately see the stereo window while I’m working on it. But this is not possible with the interlaced display of i3DStereoid — even though this is useful for some purpose as well.
4: Intermediate file handling
To export the adjusted stereo image, open the main menu again and choose ‘Save Stereo Image’. Since we want to do further editing you should choose ‘Original resolution’ in the next step. Android users should export the stereo image twice — you will see why later. If you have more sequences that need processing I recommend repeating steps 2 and 3 now, so that you end up with a bunch of properly aligned and cropped stereophotos that are saved one after another on your camera roll. That way, you won’t need additional time to search through your pictures during the next steps.
a) iOS
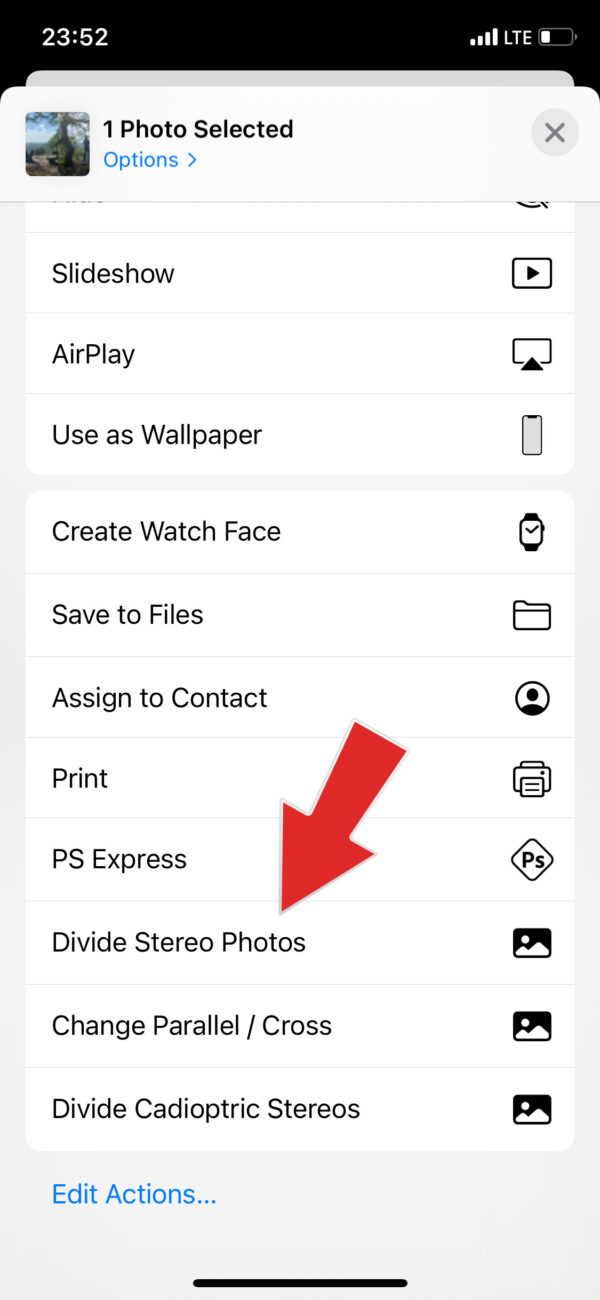
Right now, the stereo pair is stored side-by-side in one image file. For further processing, we need to separate them. Luckily, Apple offers a kind of scripting tool called ‘Shortcuts’ that allows us to automate processes like this. I’ve written a suitable shortcut for our purpose that you can download if you open this link on your iPhone. You might need to adjust some settings first (more about that here, otherwise proceed as described for Android). After downloading the shortcut, you have two possibilities to run it: you can start it directly in the shortcut app, or on your Homescreen, or you can use the ShareSheet. In this case, open the photos app and select all the stereo images exported from i3DStereoid. Then tap on the share icon, scroll down and select ‘Divide Stereo Photos’. That’s it.

b) Android
The following fiddly step might not be necessary. Still, it could prevent exceeding resolution limits that would cause automatic size reduction. So, it’s best to check if skipping this step has any effect on your final stereo image. As stated above, you should have two copies of each of your stereo photos. Go through each of the files now and cut off the right part of one copy and the left part of the other. This should be possible with Android’s standard editing tools. You don’t need to carefully cut exactly in the middle — this is just to reduce the width.
Now you should have the left and right stereo images one after another, with the right depth, and perfectly aligned.
5: Adjusting the Stereo Window
Now we have to switch to another app that is extremely useful overall. Adobe Photoshop Express (iOS / Android) is also a mobile version of desktop software. It is free with some limitations but with enough functionality for our purpose. However, I recommend buying a yearly subscription because this opens a lot of useful functions for post-processing.
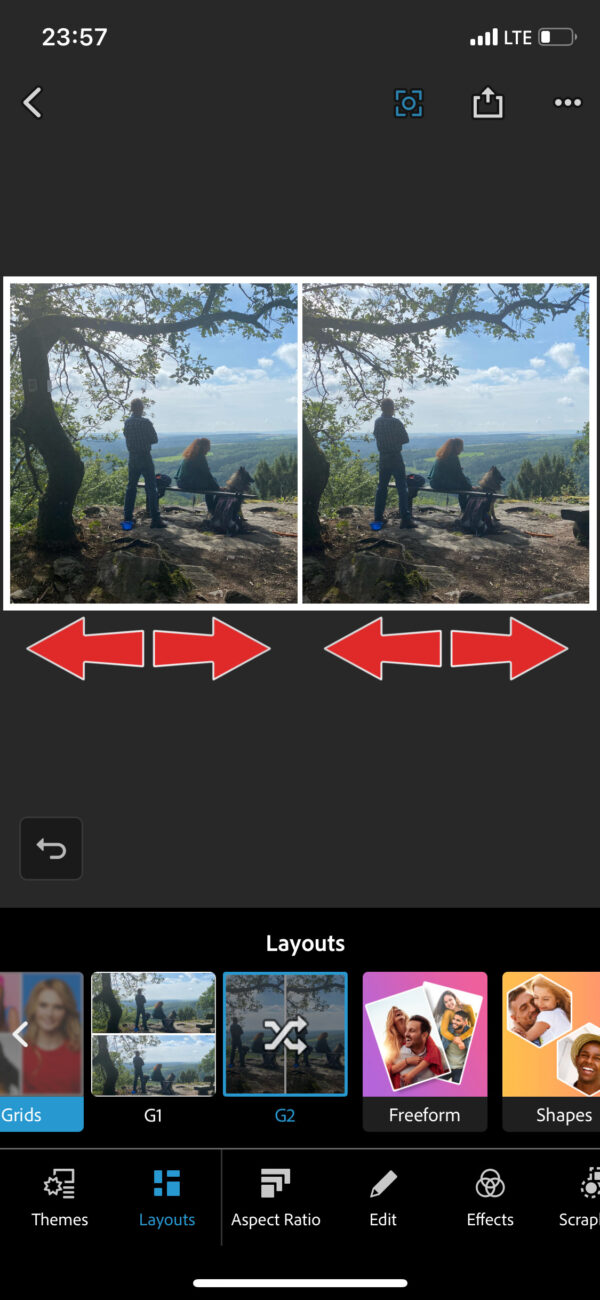
Start the app and navigate to the ‘Collage’ function. After our preparations it’s pretty easy to just select the stereo pairs and import them. The Layout section in the bottom menu lets you change the division between horizontal and vertical (mostly just titled G1 and G2). Tapping on the vertical division icon again switches the two photos so that you can change between parallel and cross view. The aspect ratio section lets you choose your desired format. I recommend 16x9 which results in almost square stereo views. The app also lets you directly choose formats suitable for purposes like Instagram posts or stories. (There are many more layout or zoom functions and plenty of online tutorials to dive into the app.) For now, that’s all we need to start with the stereo window adjustment: while you’re free-viewing the stereo photo, tap and hold one of the two images with your finger. Quickly slide your finger down out of your view. Now, while free viewing, move your finger horizontally and watch the stereo image moving forward and back in the stereo window. This technique enables you to determine exactly the best positioning for your photo.
There are basically two simple rules: moving the pictures towards each other will bring the stereo view closer, and moving the pictures away from each other will push them deeper into the window (when parallel viewing). By moving both in the same direction you can choose the image area. If a disturbing blue frame appears, just wait a few seconds and it will disappear. Sometimes you will accidentally zoom in, just double-tap to zoom out. No matters what happens, you have a comfortable undo function available.
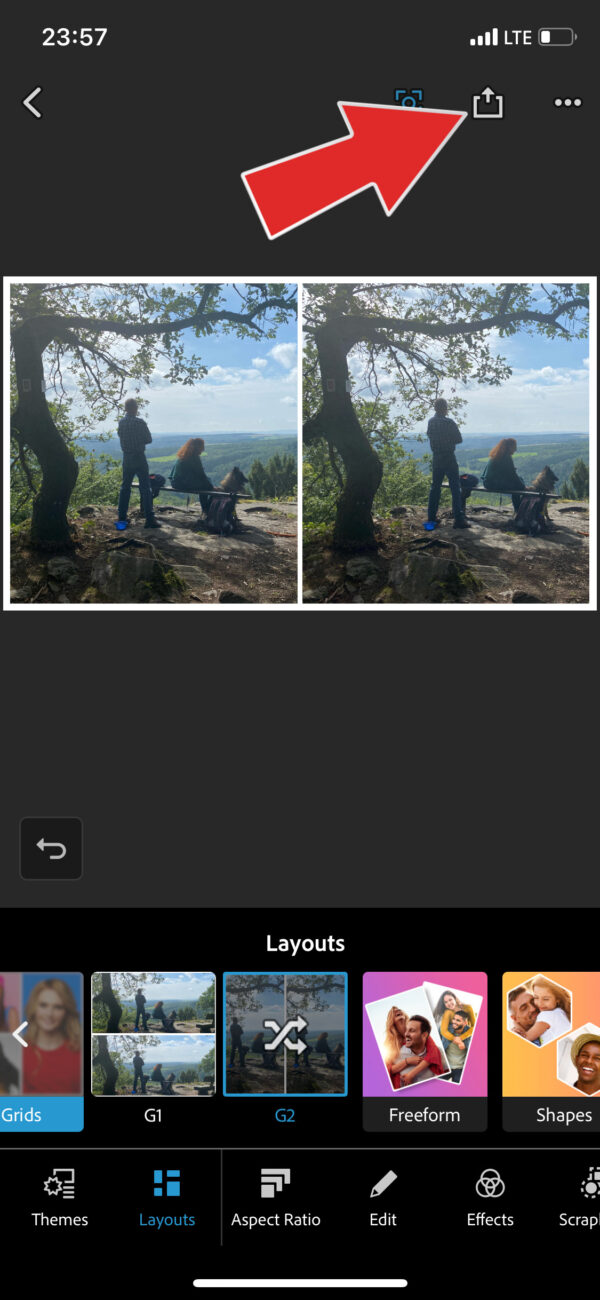
If you are satisfied with the stereo window, tap on the share icon on the top of the screen. Then select ‘Save to camera roll’. If you navigate back to proceed with the next stereo pair, you can choose whether to save the collage or not.
Again, I would recommend repeating this step with each of your prepared stereopairs before the next step.

Parallel and cross grids
You may appreciate showing your images in parallel and cross-view right underneath each other in a square grid as is directly offered in i3DStereoid. I don’t recommend starting with a collage of four photos in Photoshop Express for that purpose. Instead, work as described using your preferred viewing method and export the collage once. Then switch the two images like described above and export again. That serves for the same stereo window in both versions. Afterwards, import both collages into a new collage without any additional borders. Sounds complicated? Well, that may be true. Maybe it’s better to adjust the stereo window in the ‘Adjust mode’ of i3DStereoid in this case.
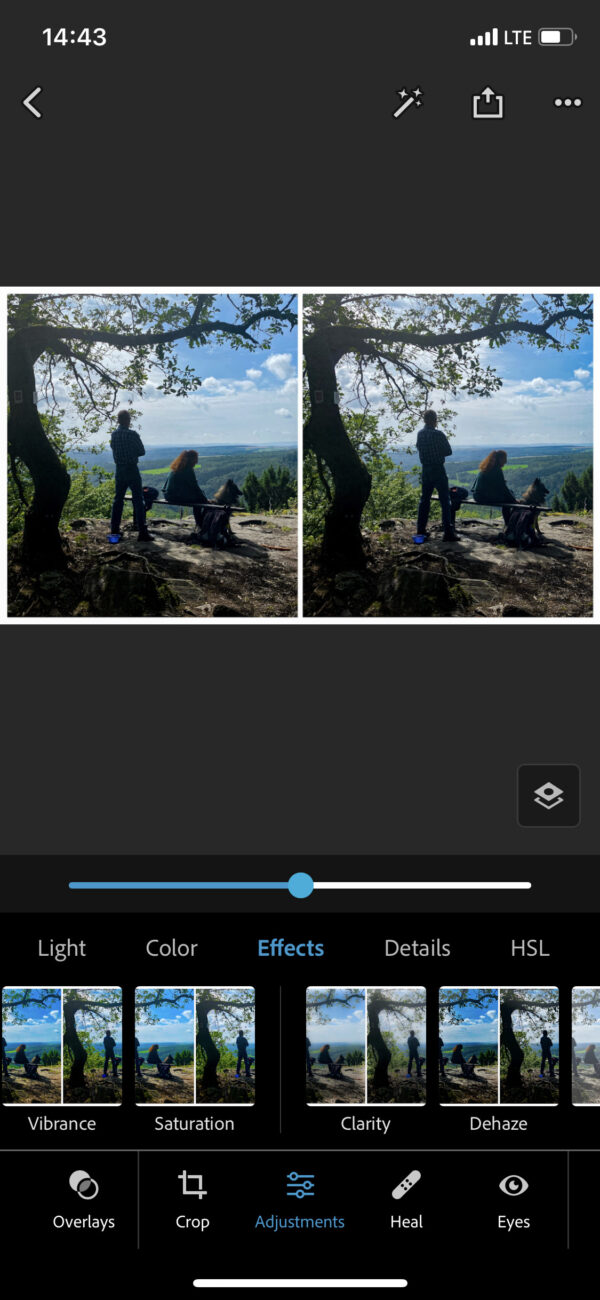
6: Post processing
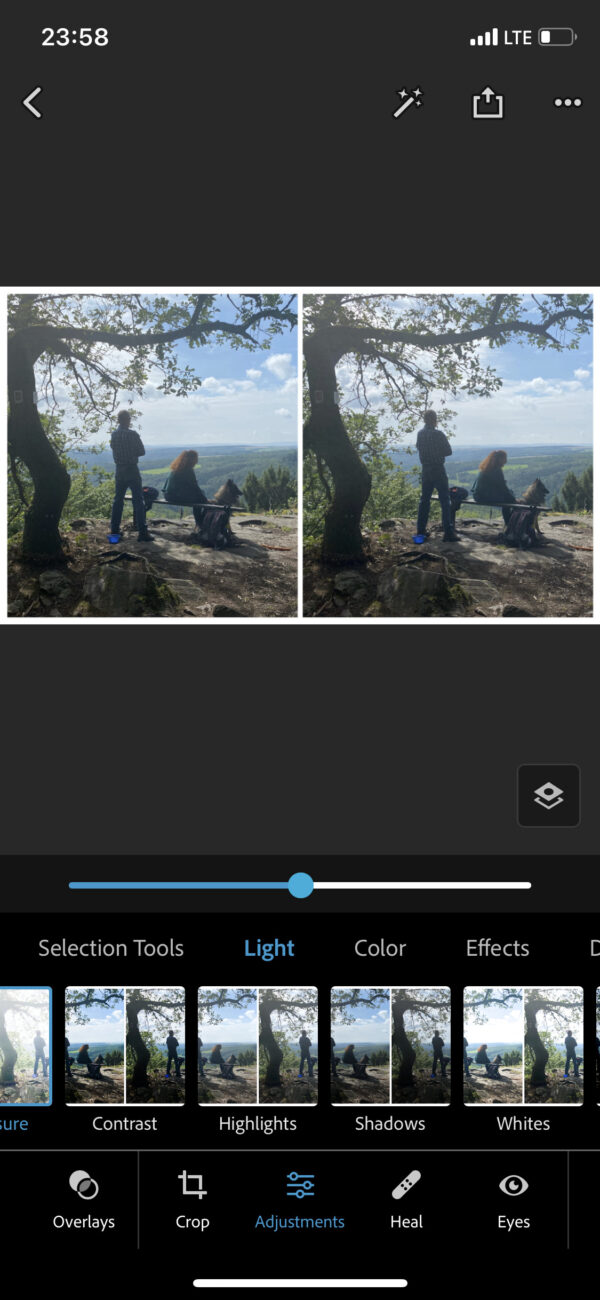
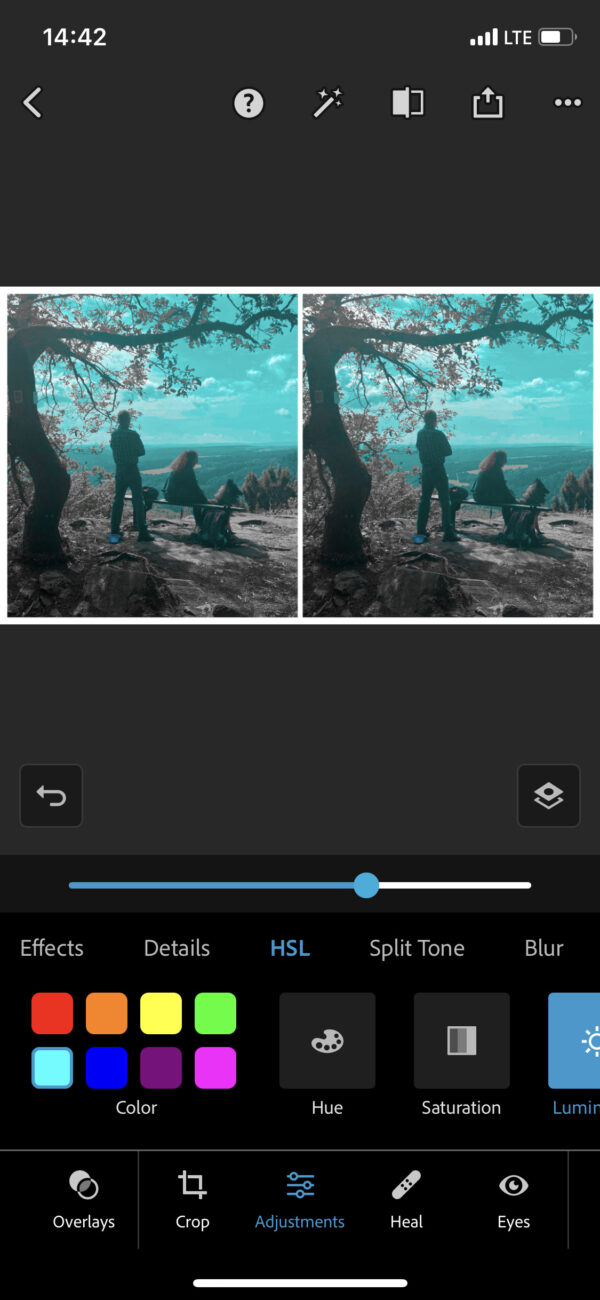
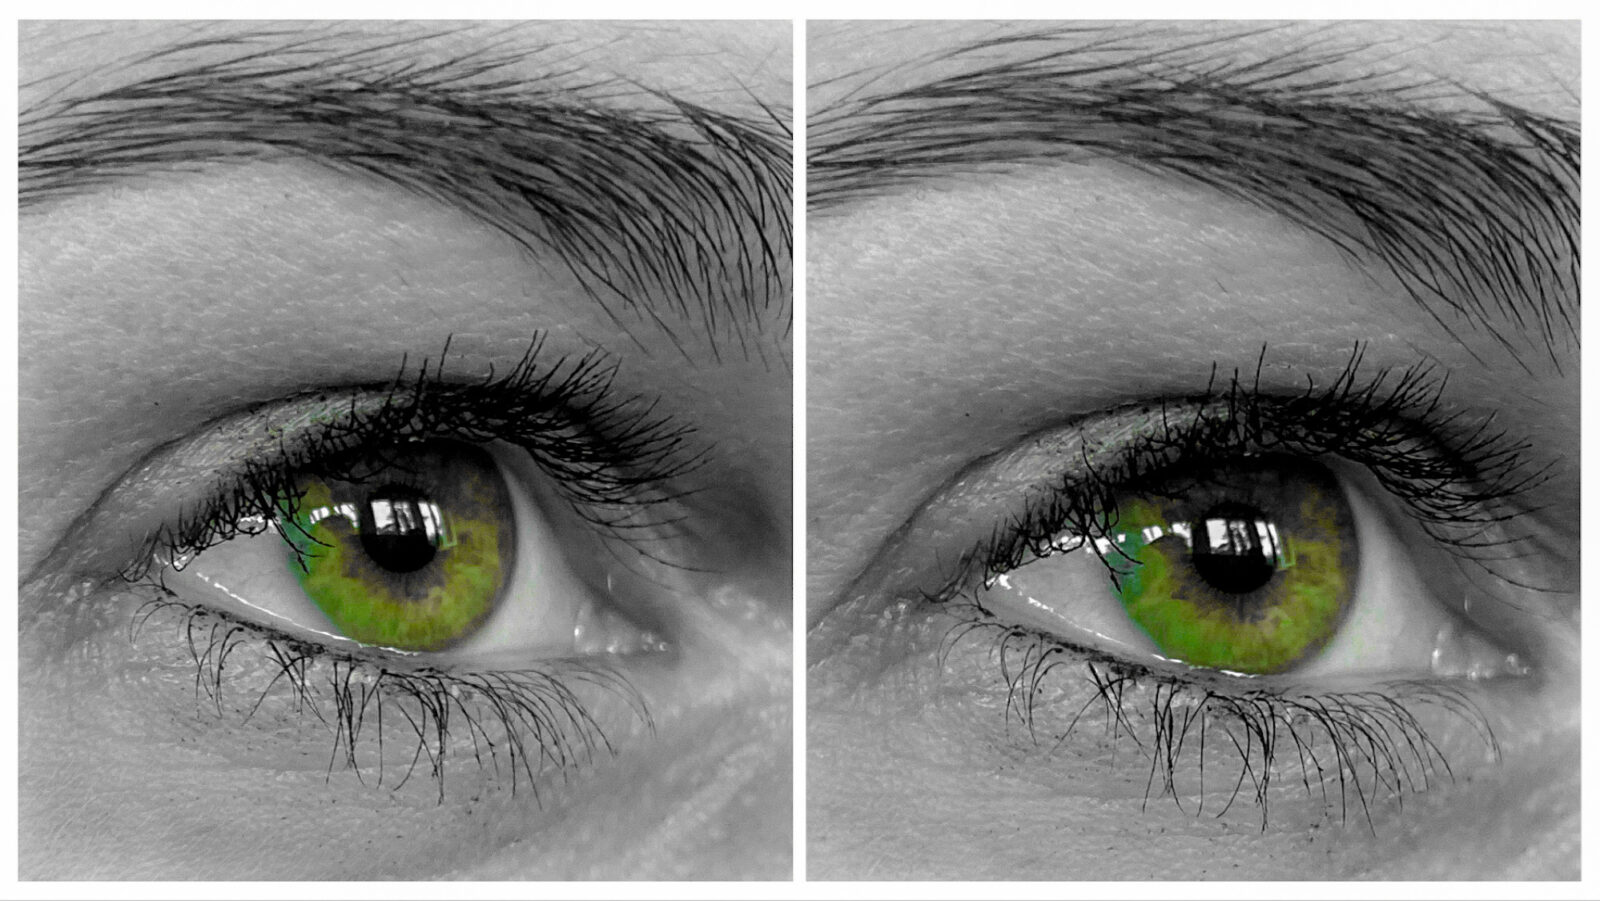
As you will know, Photoshop’s centerpiece is post-processing photos, and the same applies to Photoshop Express. If you choose ‘Edit’ instead of ‘Collage’ on the app’s start screen you can re-open the exported stereo photo, choose ‘Adjustments’ in the bottom menu, and apply different effects. Beside exposure, contrast, and other commonly-known settings, it’s especially useful to control highlights and white tones, and similarly shadows and black tones, independently. Try lightening up the shadows while darkening the black tones! Furthermore, I especially recommend ‘Clarity’ and ‘Dehaze’. Finally, artistic color adjustment is possible in the ‘HSL’ section where you can reduce or increase the saturation of specific colors. Most of these are only available in the paid version though.
If you’re done, you don’t need to export the picture manually. Just navigate back and confirm to save. A new copy will be created. Voilà — that’s your final stereo photo ready to post or send anywhere.
Alternatives
If you don’t want to subscribe to Photoshop Express or don’t feel comfortable using this app, it’s also possible to use the built-in iOS or Android image editing in a satisfying way. If that’s the case, you also might need to think carefully about how you want to adjust the stereo window. Like I mentioned above, this is possible in the ‘Adjustment mode’ of i3DStereoid. If you prefer the free-viewing adjustment, there are many collage apps available. But don’t forget to check whether they reduce the file size or insert unwanted watermarks.
7: Tidy up
Depending on your phone’s storage it might be necessary to delete some of the files that were generated during the process. If you repeated step 2 and 3 before starting off with Photoshop Express, and did likewise with step 5, you have your camera roll quite organized despite the large number of pictures. This makes it easy to choose which ones to delete and which ones to keep. I would only like to give you one piece of advice: you never know where you are going to present your pictures at some point. Whenever you change the medium in which you present stereophotos, it can be necessary to increase or decrease the baseline. So that’s another advantage of taking more than two images, and that’s why you should keep your original photos. You can store them somewhere on an external drive or card.
Conclusion
As I mentioned above the smartphone has become my number one device to take stereo photos. Of course, if I need to take simultaneous stereo photos, I take my stereo rig. But even then, I transfer the photos directly to my phone, and luckily, there is a cable for that. This is because of three more reasons that I don’t want to withhold from you: first, I have found a vivid and interested stereo community on Instagram — basically designed for use with a smartphone. Secondly, the smartphone is a really good viewing device, be it for free viewing, or be it inserted into a viewer like the LSC Owl. Even magnified phone screens don’t get as pixelated as computer monitors. Finally, not only do I have my smartphone always at hand to take stereo photos. I also have it readily available whenever I have to kill time. For those moments, what could be better than doing a few standard processing steps to get new stereo photos?
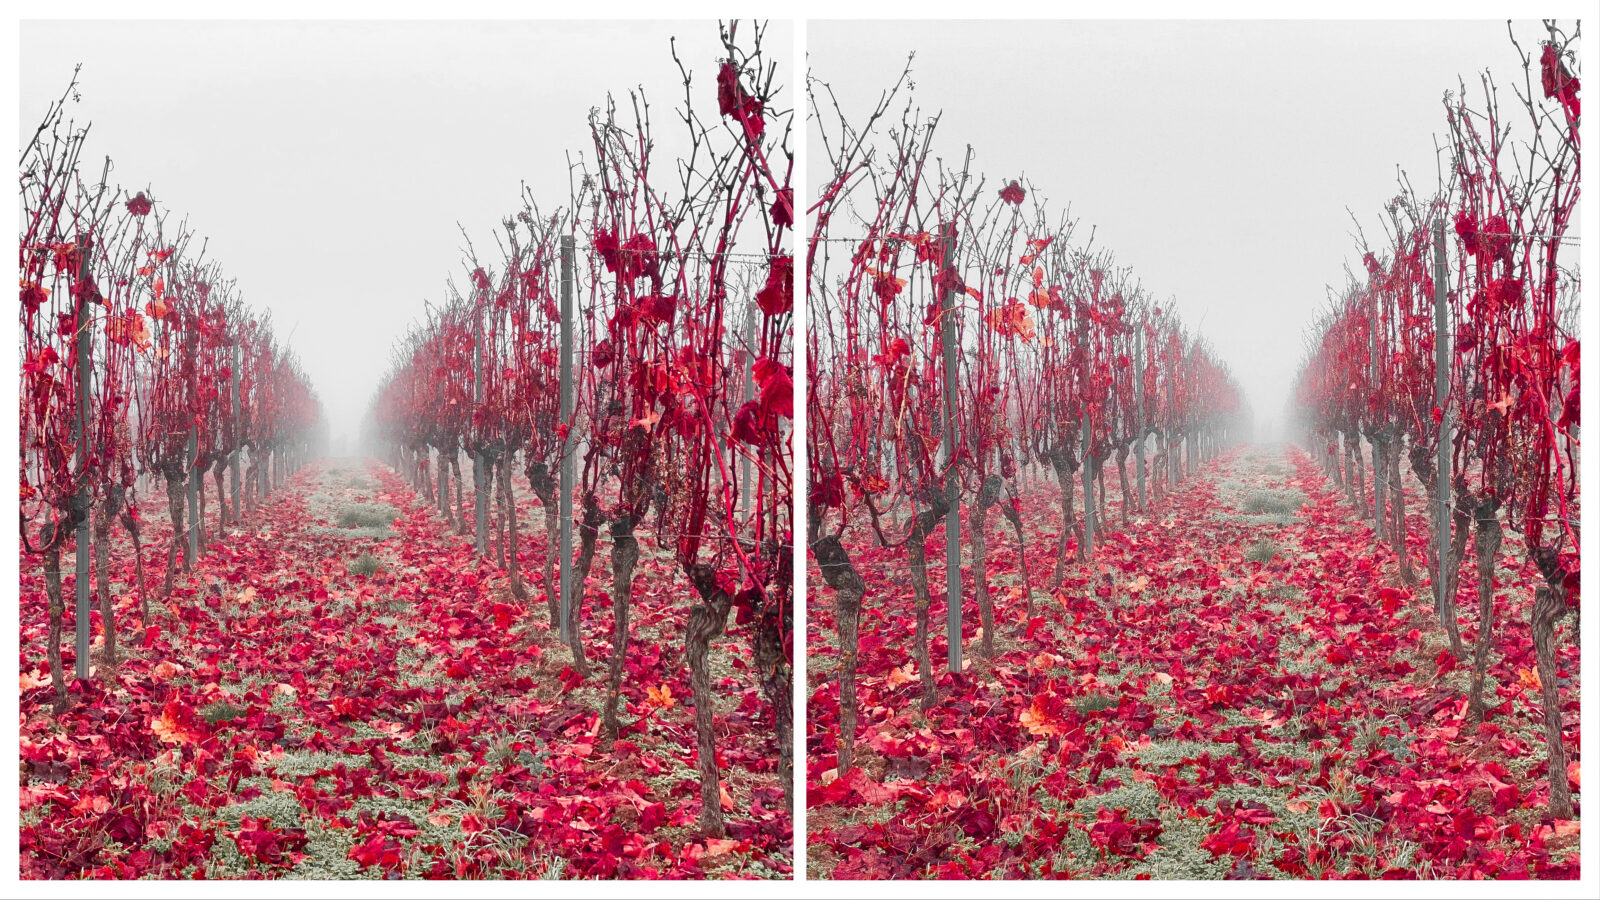
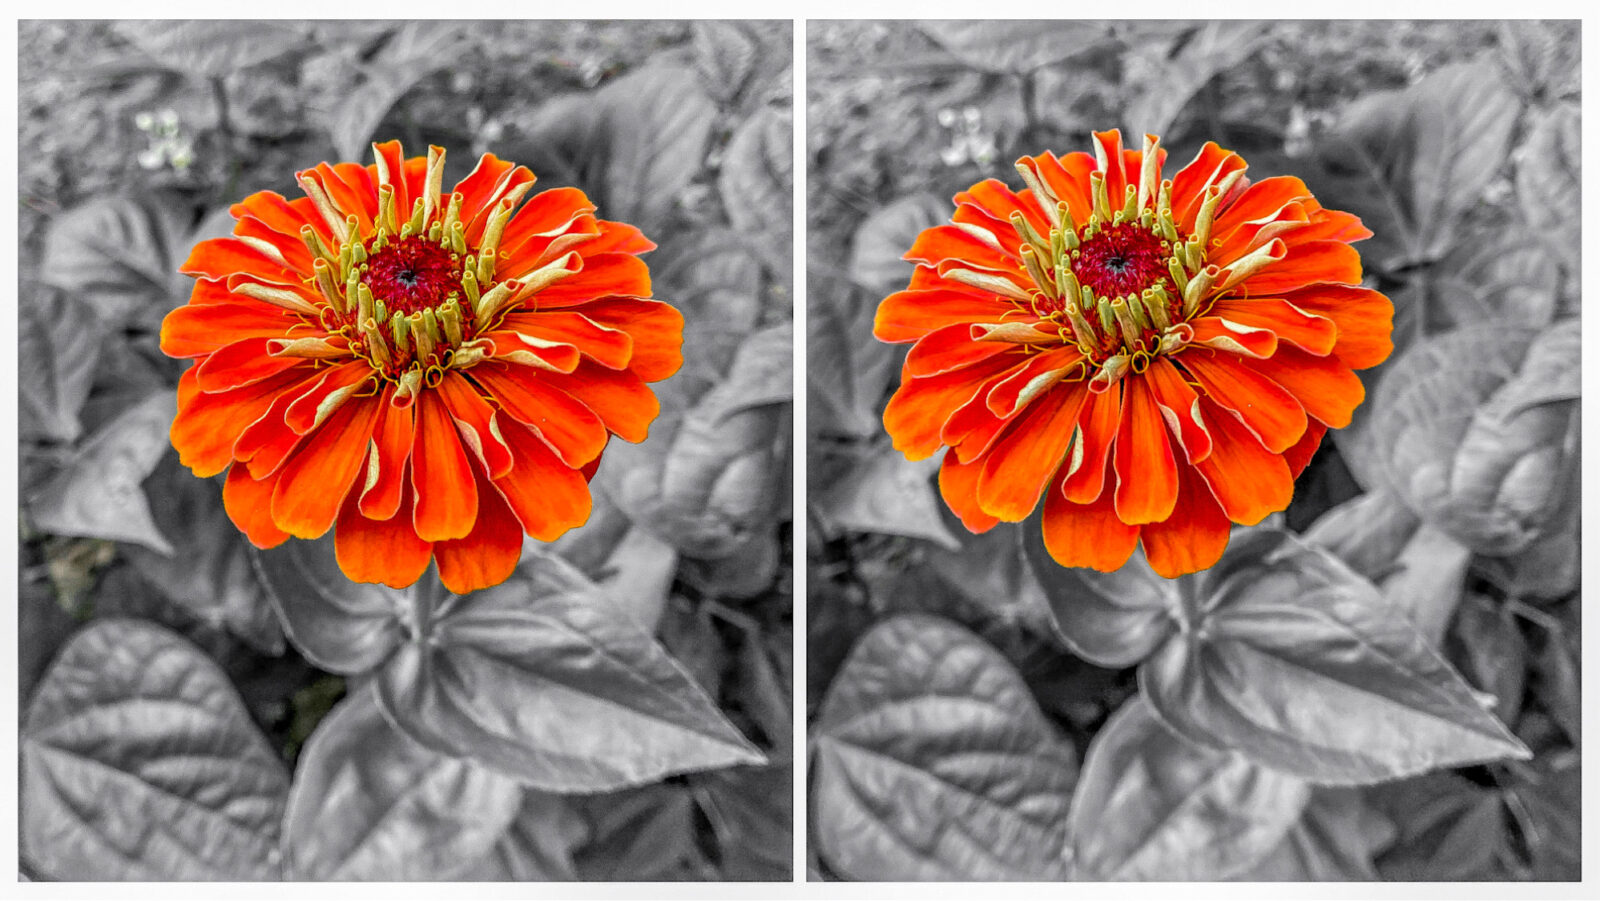
These photos required slightly more artistic post-processing but were still edited entirely on the smartphone.
Pascal Martiné (Mainz, Germany)
Passionate about stereoscopy as a collector and photographer since 2016. Admin of the stereosite. More on About me.