
Getting the Right Depth in 3D Photography
written for the stereosite by David Kuntz, USA
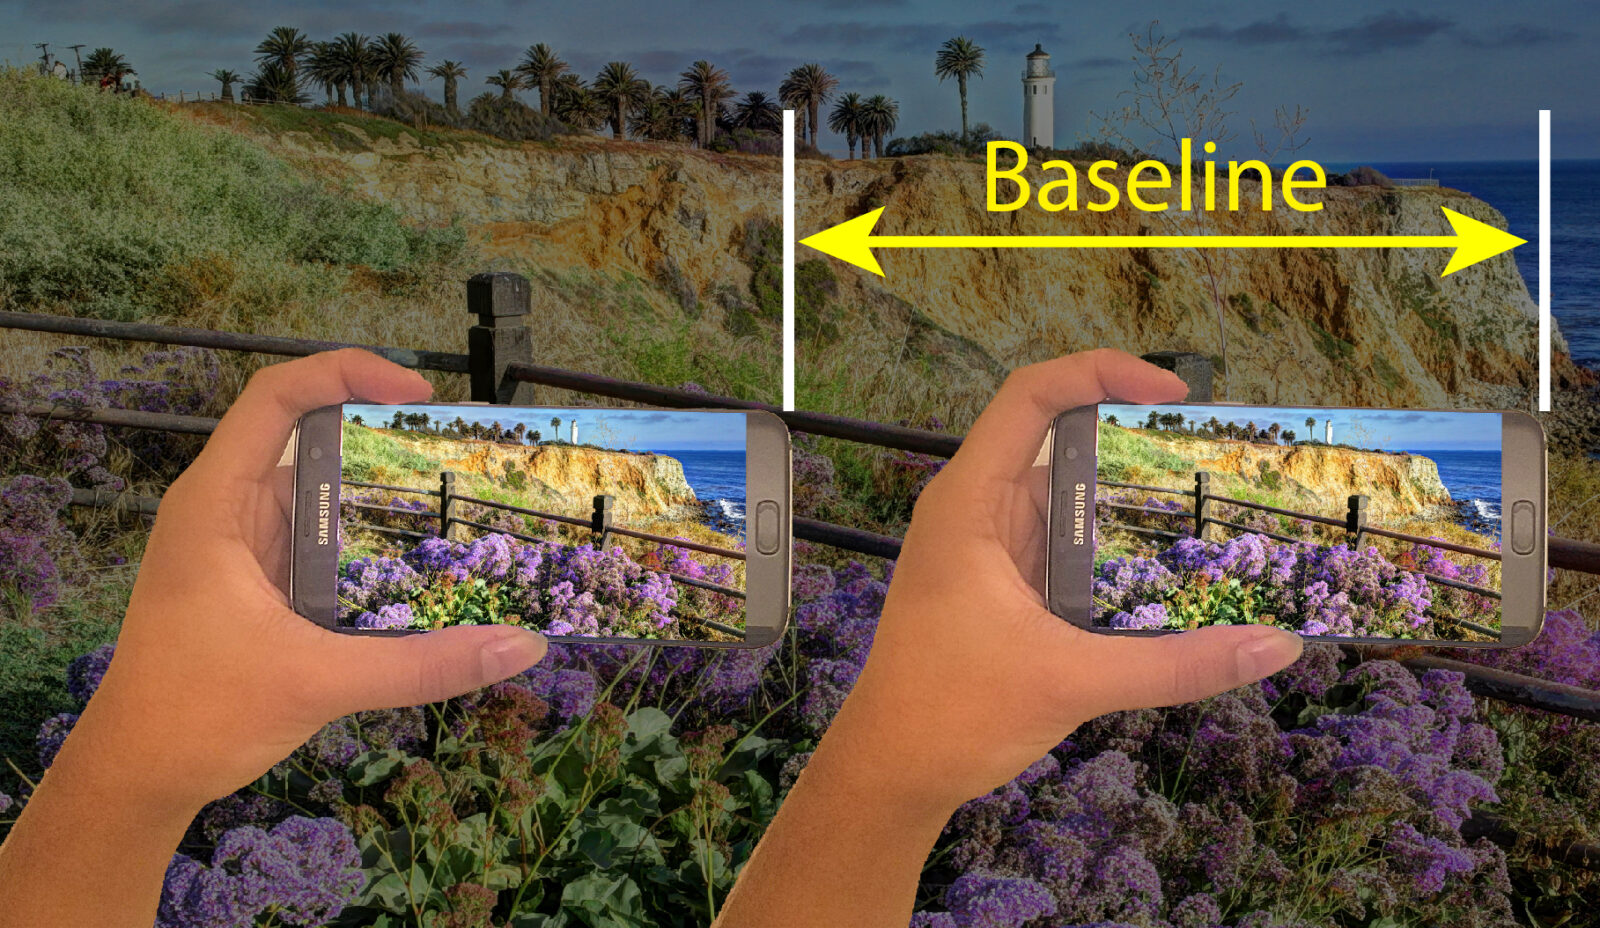
A 3D photograph usually consists of two images of the same subject taken from different viewpoints. One of the most common questions amongst both experienced and new stereo photographers is how to determine the right distance (typically called baseline, stereo base, camera separation or interaxial distance) between the left and right camera positions that should be used when taking the photos. The photograph illustrates what baseline is; again, it’s just the distance between the camera positions where the left and right images were made.
Why Does Baseline Matter?
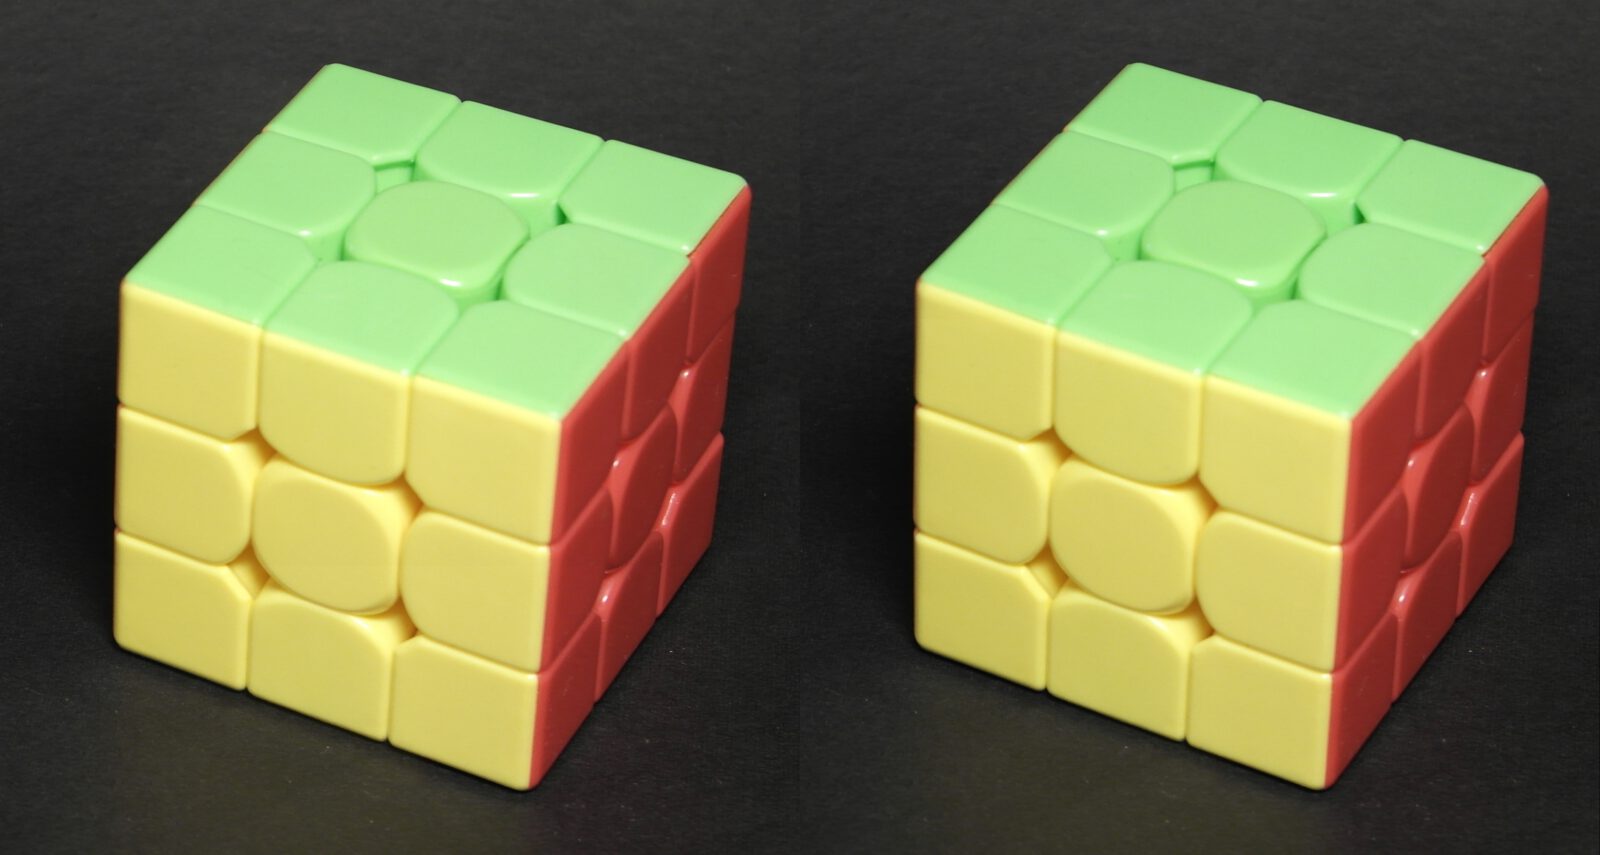
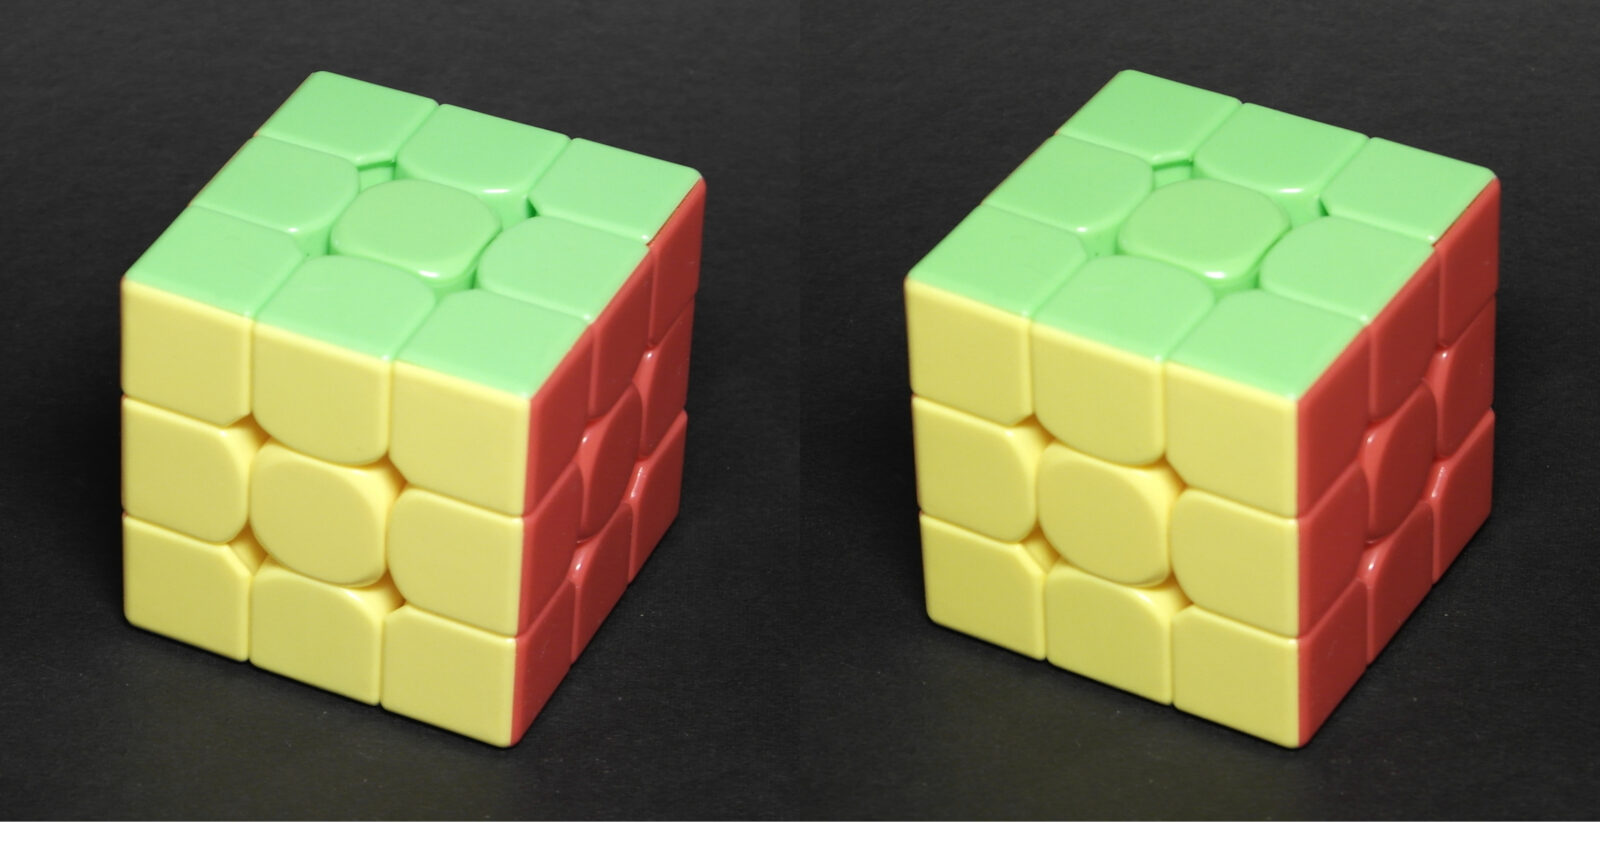
What difference does baseline make? Who even cares? Well, to see why it’s important, let’s look at a series of 3D photographs of the same object made with progressively larger baselines. In the sequence of cube photos, #1 starts with the smallest baseline, and the baseline is steadily increased through photo #9.
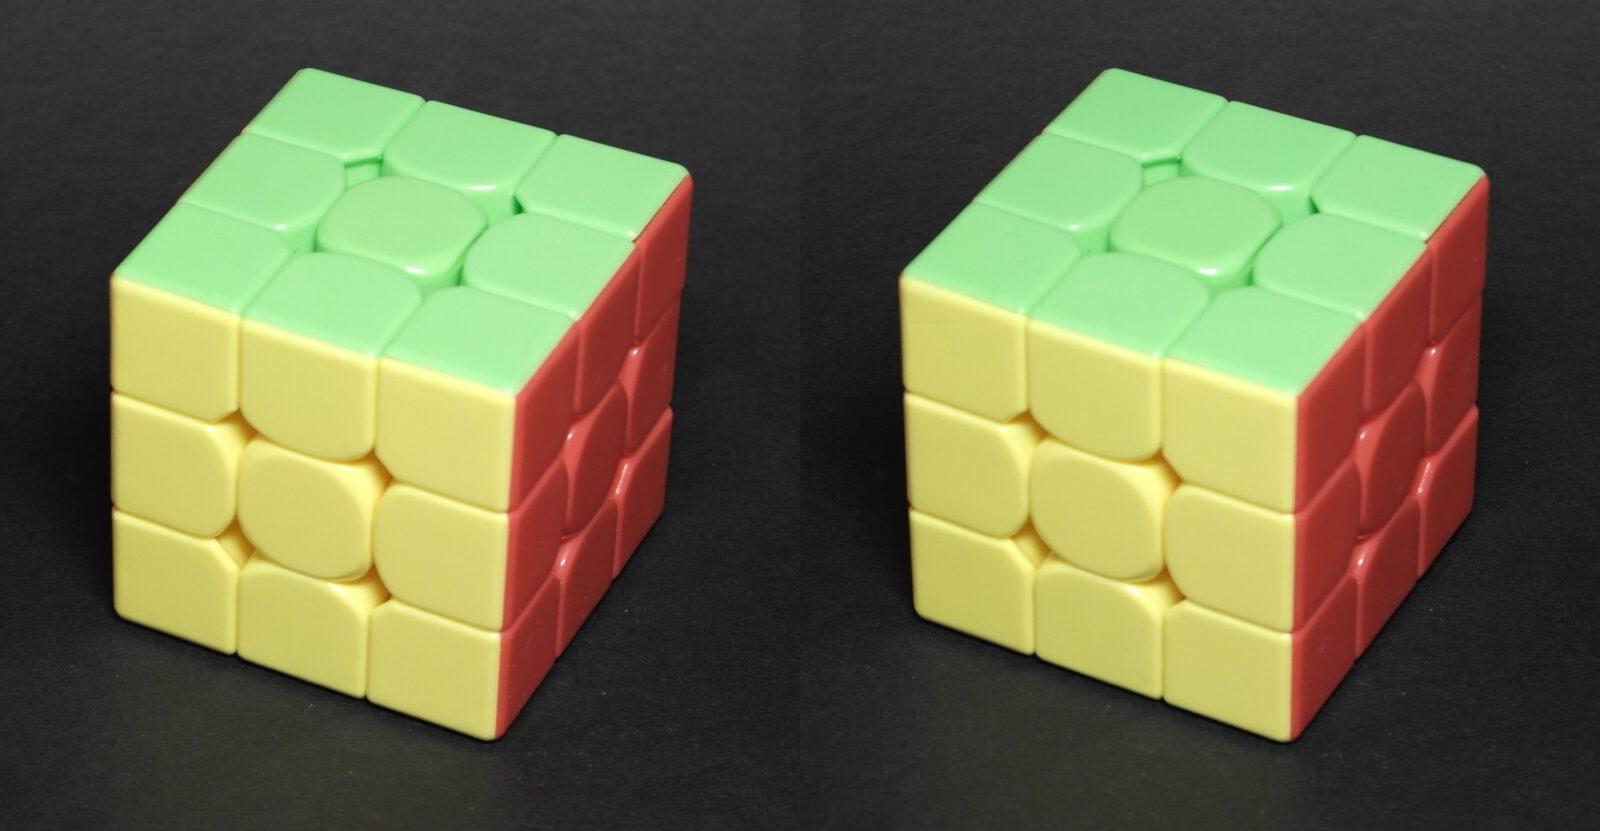
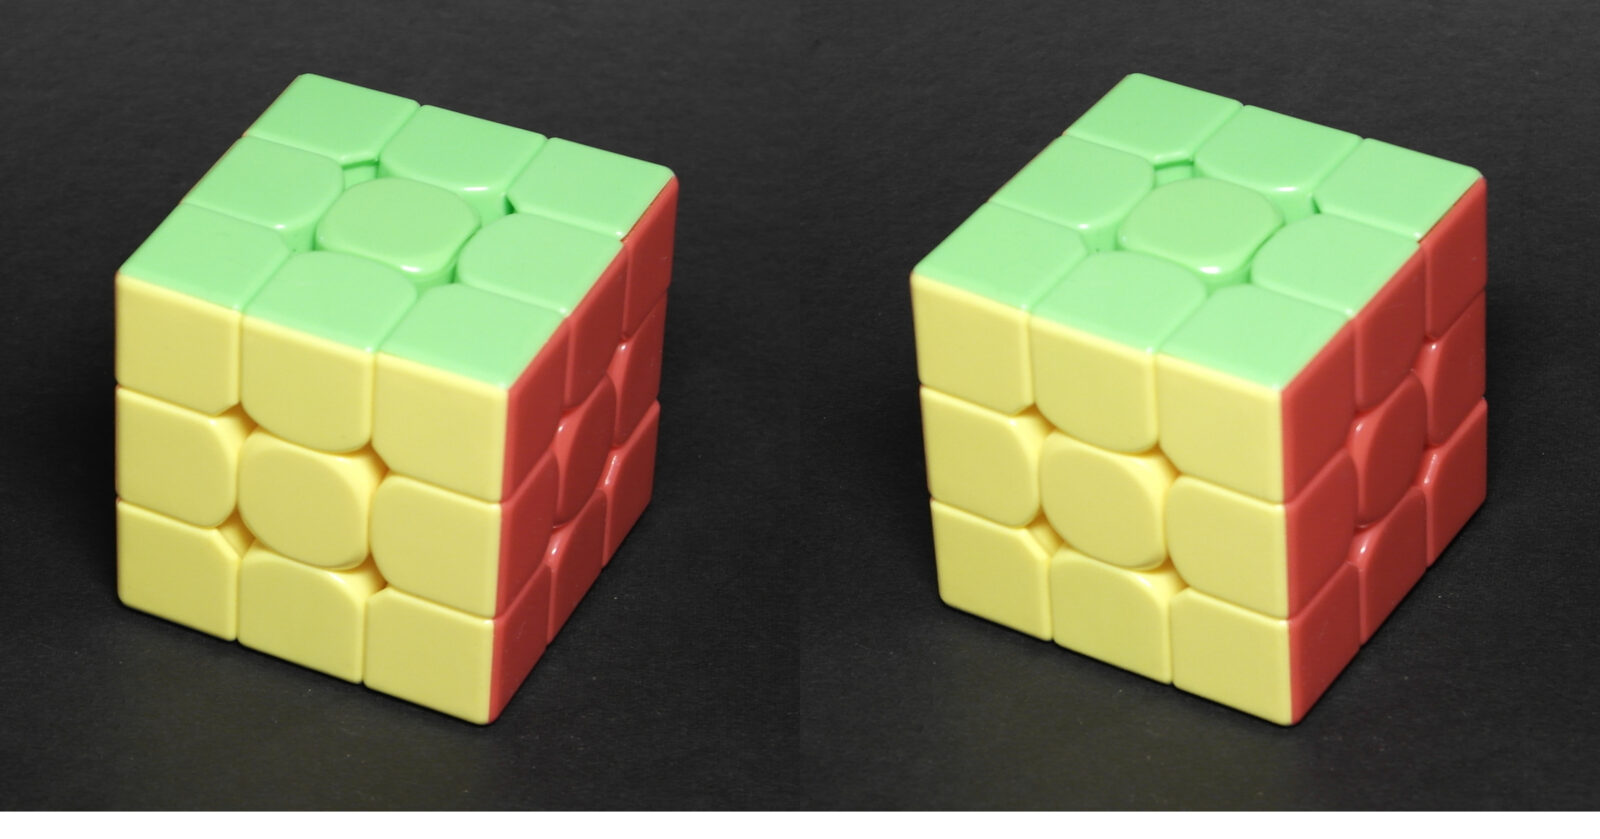
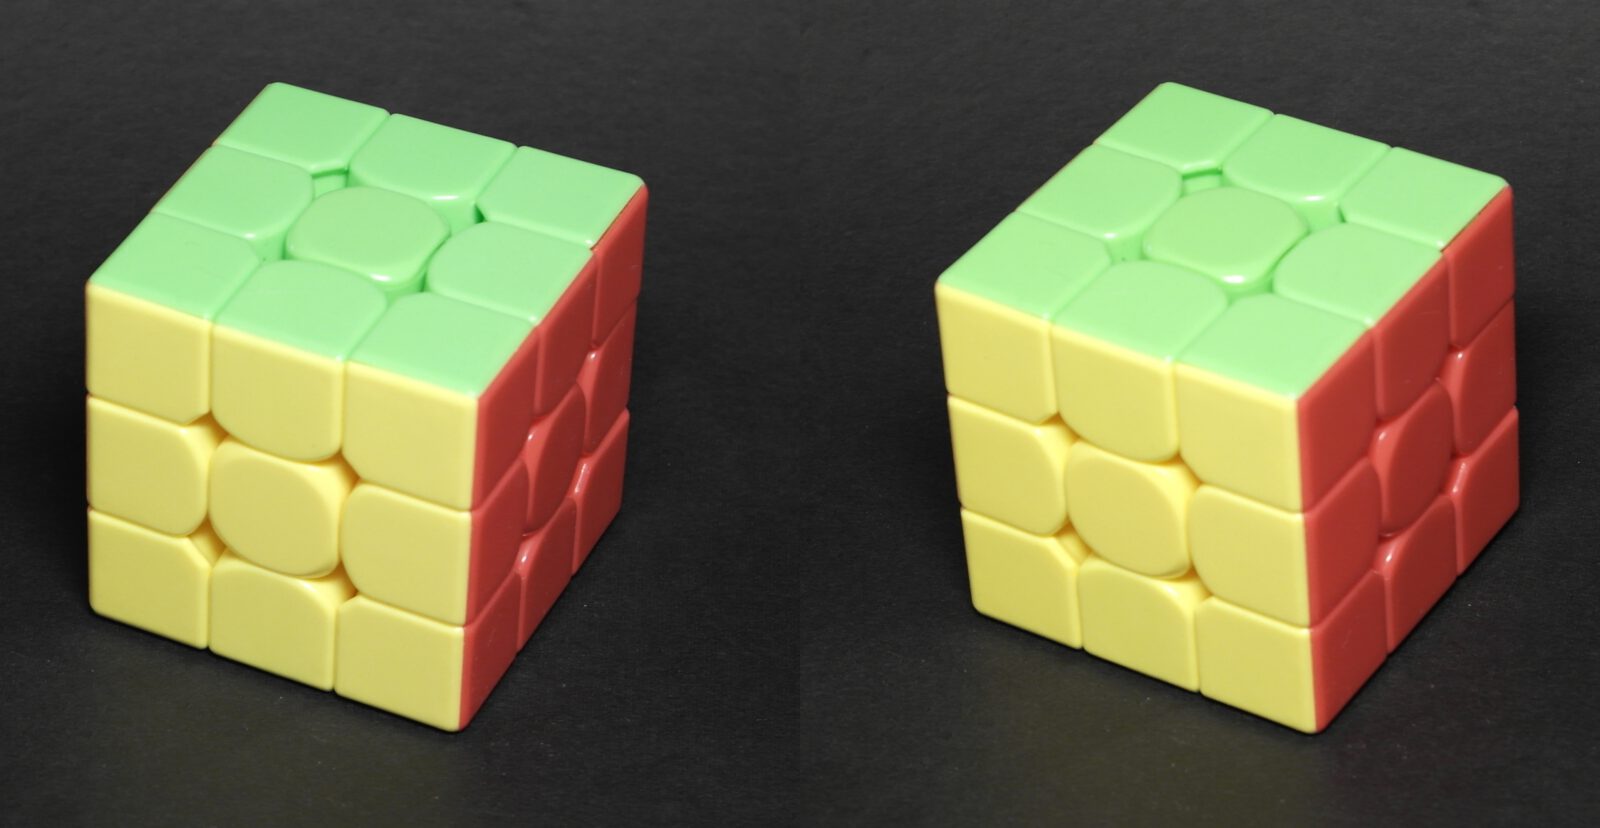
Depending upon how you’re viewing these images (which are made for parallel viewing), you’ll probably see almost no 3D in the first couple images. Then, somewhere in the “medium baselines” set, maybe at image #5, the cube will look fairly “natural” and have a satisfying amount of depth. In the last few images, the shape of the cube may start to look distorted, and it may even be hard for you to view it in 3D.
Small Baselines
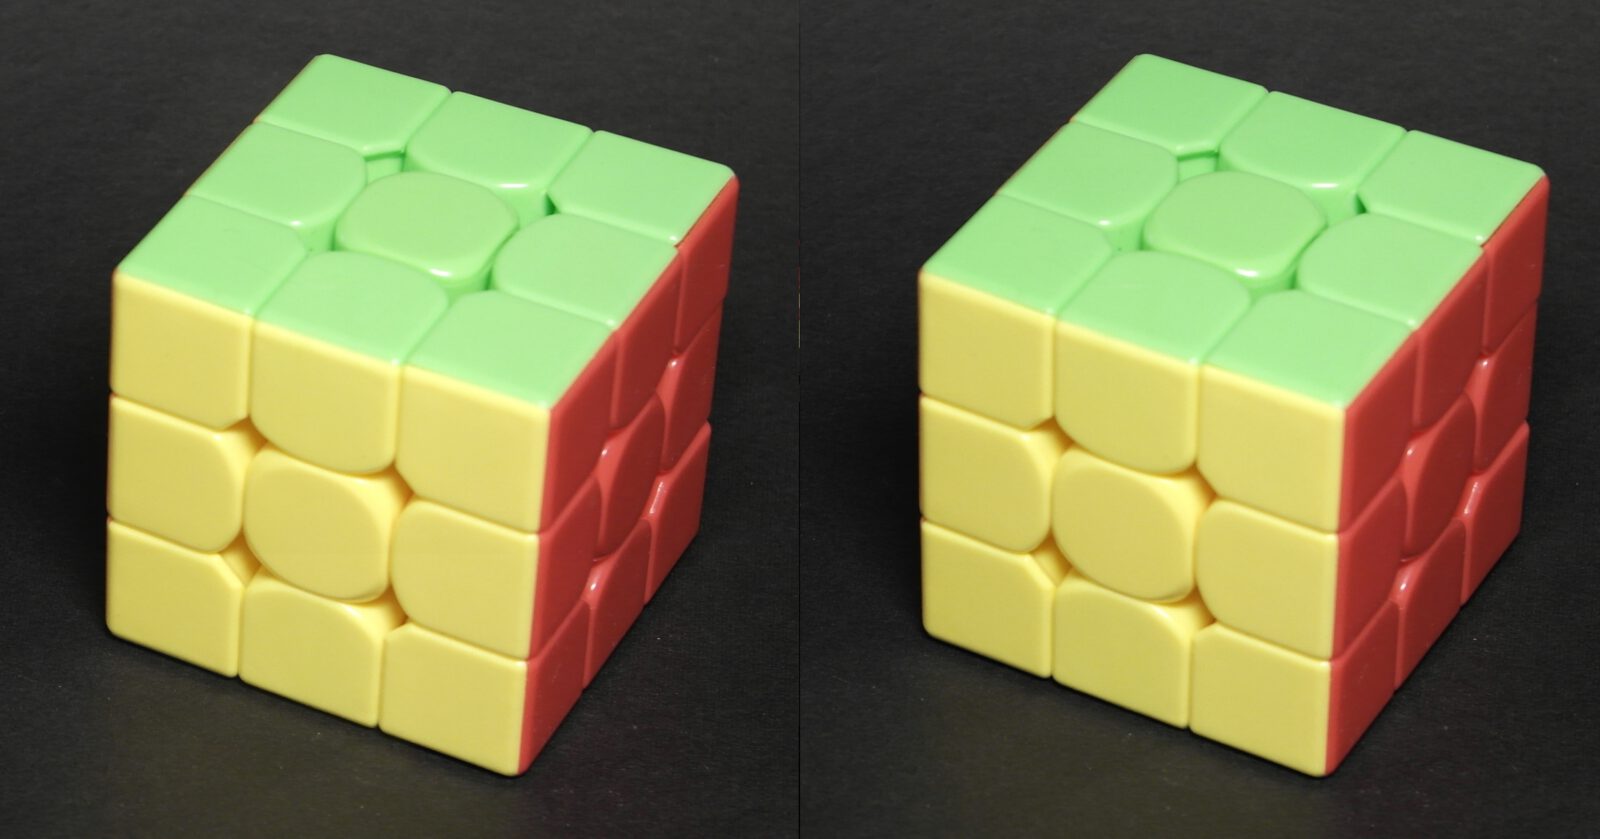
Medium Baselines
Large Baselines
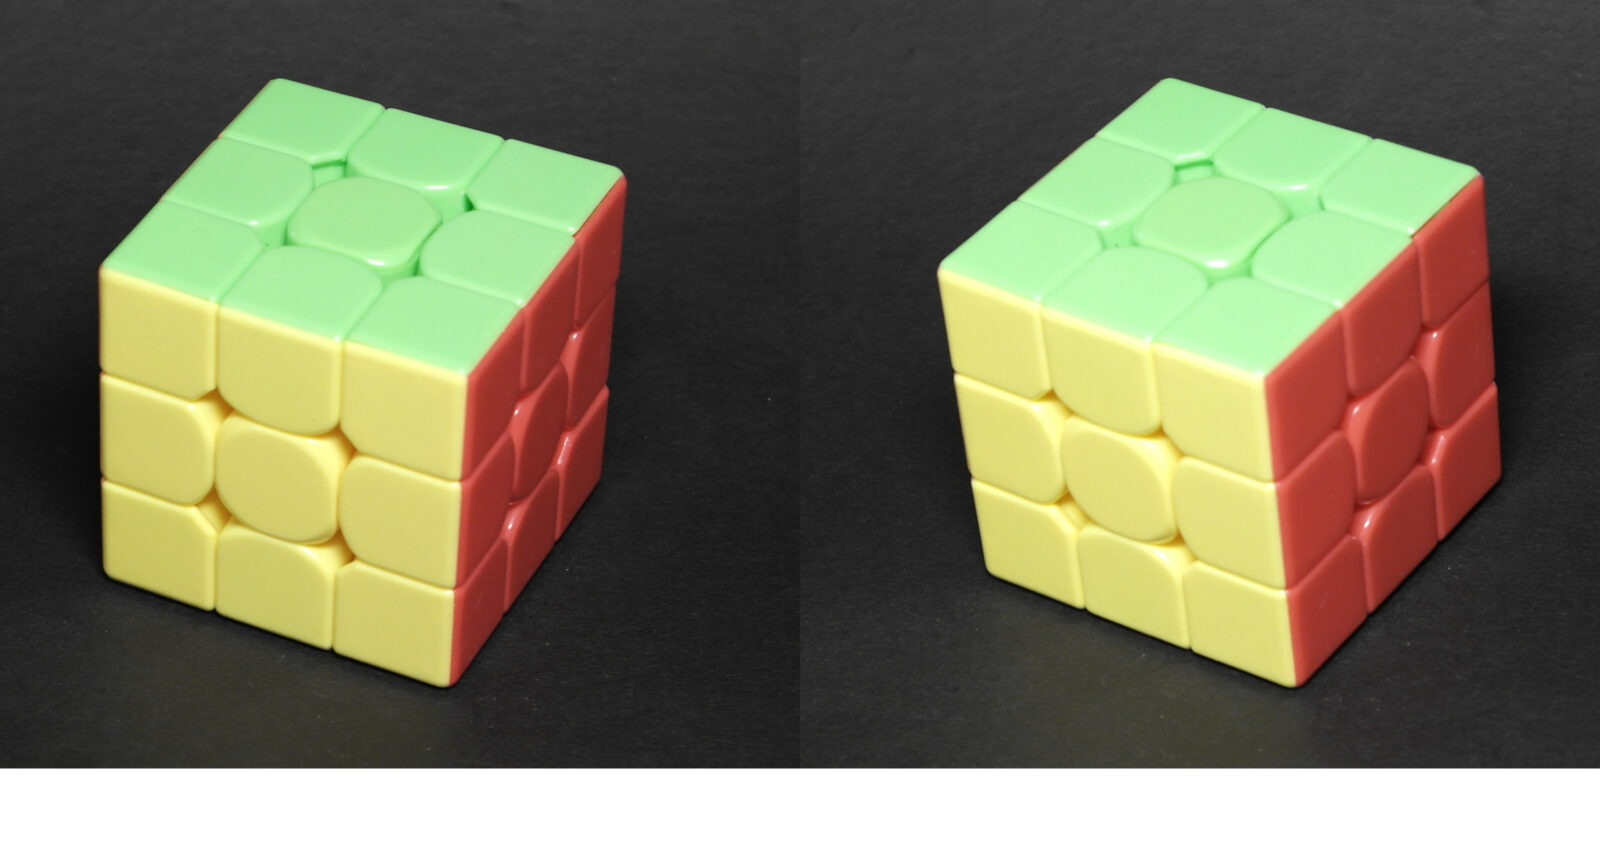

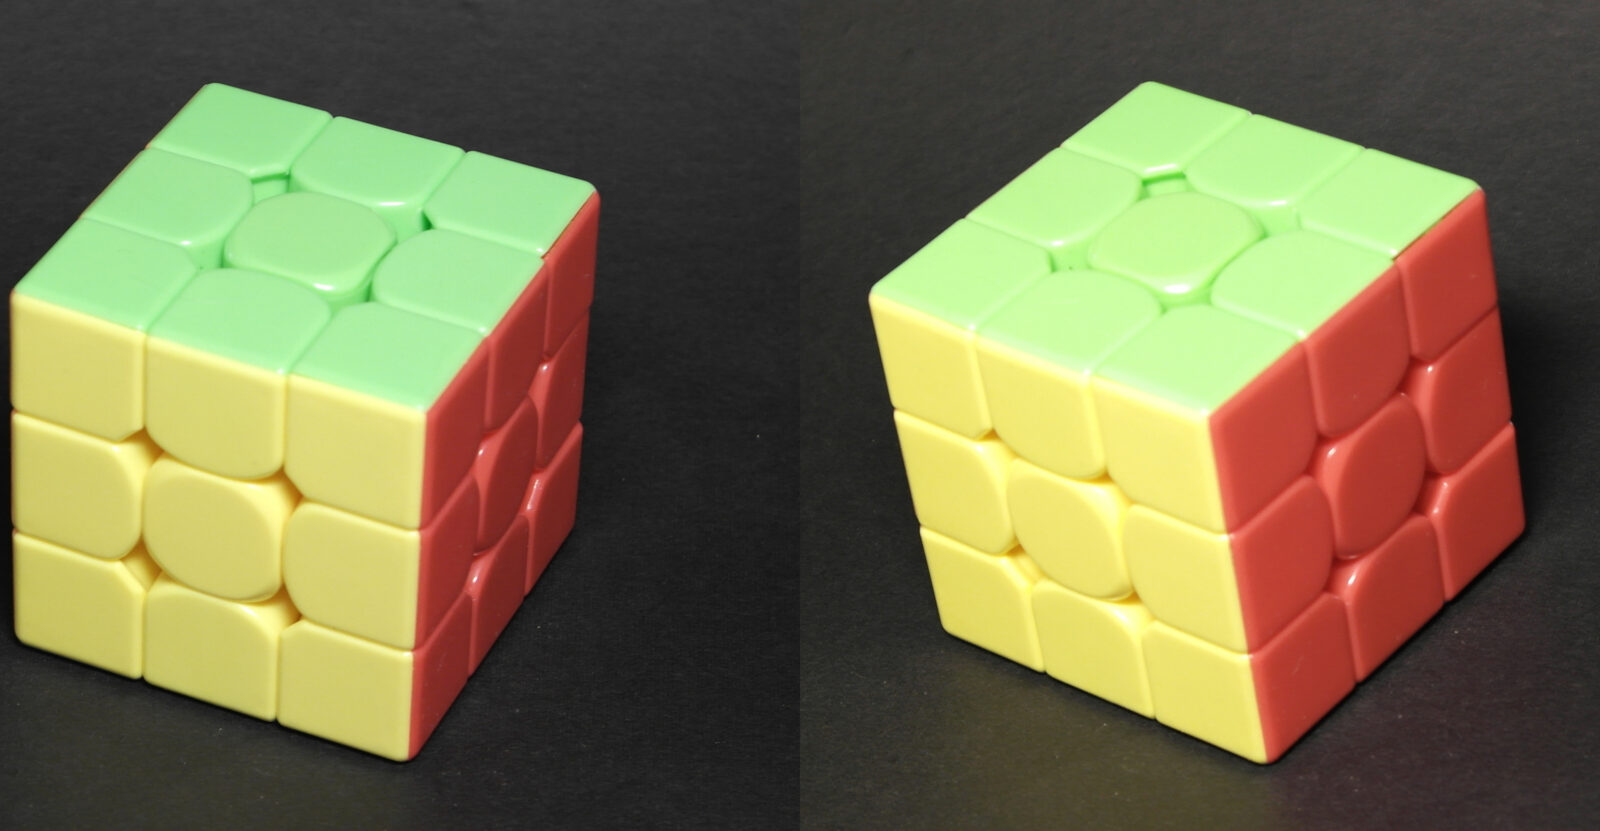
Don’t worry about exactly which 3D of the cubes looks best to you – the takeaway is that too little baseline gives you almost no 3D effect, and too much baseline makes the image hard to view, or distorted looking. The right baseline gives you an image that has a satisfying amount of 3D, isn’t uncomfortable to view, and doesn’t distort the object (assuming you want to avoid that).
What is the Right Baseline?
So, how do you know what the right baseline is for a specific photograph that you want to take? The answer is, “It depends.” And it depends on a lot of things. Some of these are related to the subject material you’re photographing. These include:
- Subject size (especially subject depth)
- Subject distance (from the camera)
The other things that influence what baseline will work best have to do with the way you’re going to reproduce or view the image. These include:
- Viewing screen or print size
- Viewing distance (from your eye to the display or print)
- Viewer type (particularly magnification if you’re not just freeviewing)
In particular, it’s important realize that the larger you’re going to reproduce your 3D image, the less overall depth it should have. Similarly, the farther back you are from the display (or print), the less depth you should (typically) have. So, an image meant to be viewed on a large screen TV should have less depth than one intended for viewing on a cellphone display.
All this may seem like an awful lot of factors to consider. And, exactly calculating or even estimating the right baseline value could be quite complicated, especially since you may not actually know all the information you need. But, there are a couple of ways to make it simpler.
Practical Methods
If you’re taking sequential photos (that is, using a single camera to take the left and right images one after the other), then, you can just take several photos, gradually moving the camera in the same direction between each exposure. This is illustrated in the photo.

After you’ve taken this series of photos, you view various combinations in 3D – for example, the leftmost photo with the one taken immediately to the right of it (#1 and #2), or the leftmost photo with the photo taken a couple of places farther to the right (#1 and #4). Then, you just pick the pair of photos that look most satisfying to you.
That’s exactly what was done with the cube photos. It’s 10 photos of the same object, in which the camera was moved slightly to the right between each exposure. Then, nine 3D pairs were made. In each case, the leftmost original photo is on the left, and it’s then paired with ones on the right which were made at successively larger and larger baselines (#1 and #2, #1 and #3, #1 and #4…). And again, you can just pick out the 3D pair that looks good to you.
This may sound like a lot of work, but once you’ve had some experience you’ll get a feel for how much baseline works in a given situation. Then, you’ll probably find yourself taking around five photos of a subject and getting one that works well when you start matching them up.
As I mentioned before, a specific 3D pair may look perfect on Instagram but might not be usable for a large screen projection. So, another benefit of shooting a sequence of images is that it enables you to create multiple 3D pairs having various amounts of depth for different purposes. And, even if you don’t want to do that right now, it’s worth saving all your images in case you want to go back later and produce another 3D with a different amount of depth. Perhaps your stereo photos will be part of a projected show sometime in the future.
If you’re shooting with a two-lensed 3D camera, like a Fuji W3, then your baseline is already set, and you can’t change it. In this case, you control the depth in your photo by positioning yourself (and your camera) relative to the subject matter. In other words, you might get closer to or farther from your main subject, or choose to keep elements that are very close or very far out of your composition.
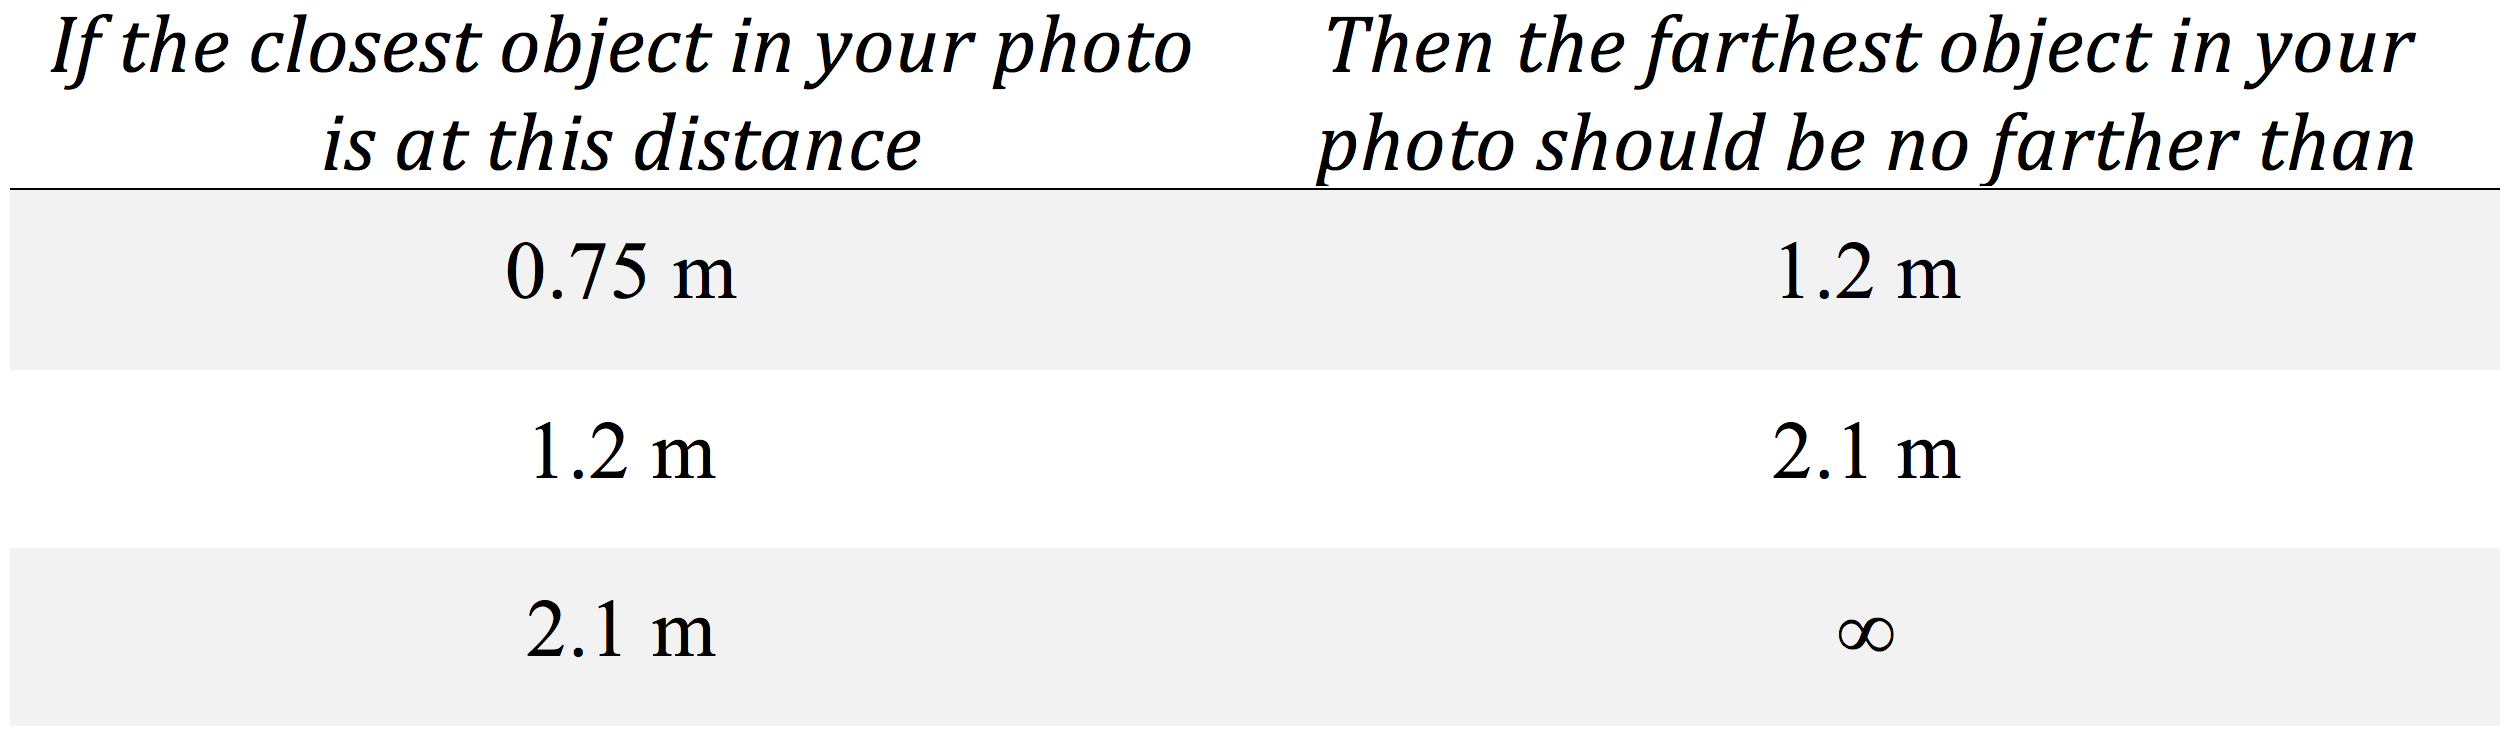
Specifically, when shooting with the Fuji W3 or W1, which have a stereo base of about 75 mm, arrange your photo so that the closest and farthest objects in it were at distances corresponding to the values in the table. This will reliably produce images which are suitable for large screen viewing. If you’re displaying your images on a small screen, you can stretch the depth range in your composition a little farther than this.
Composition
It’s also important to realize that viewing comfort with a 3D photo depends on both total image depth, as well as the way that depth is distributed throughout the image. The next drawing illustrates that. It shows three series of circles. In each case, the total depth between the orange and purple circles is the same. However, for me personally, I find the top set, in which the orange and purple circles overlap, slightly unpleasant to view. My gaze keeps shifting between the orange and purple circle, and the jump in depth between them is a bit annoying and difficult for me to take in.
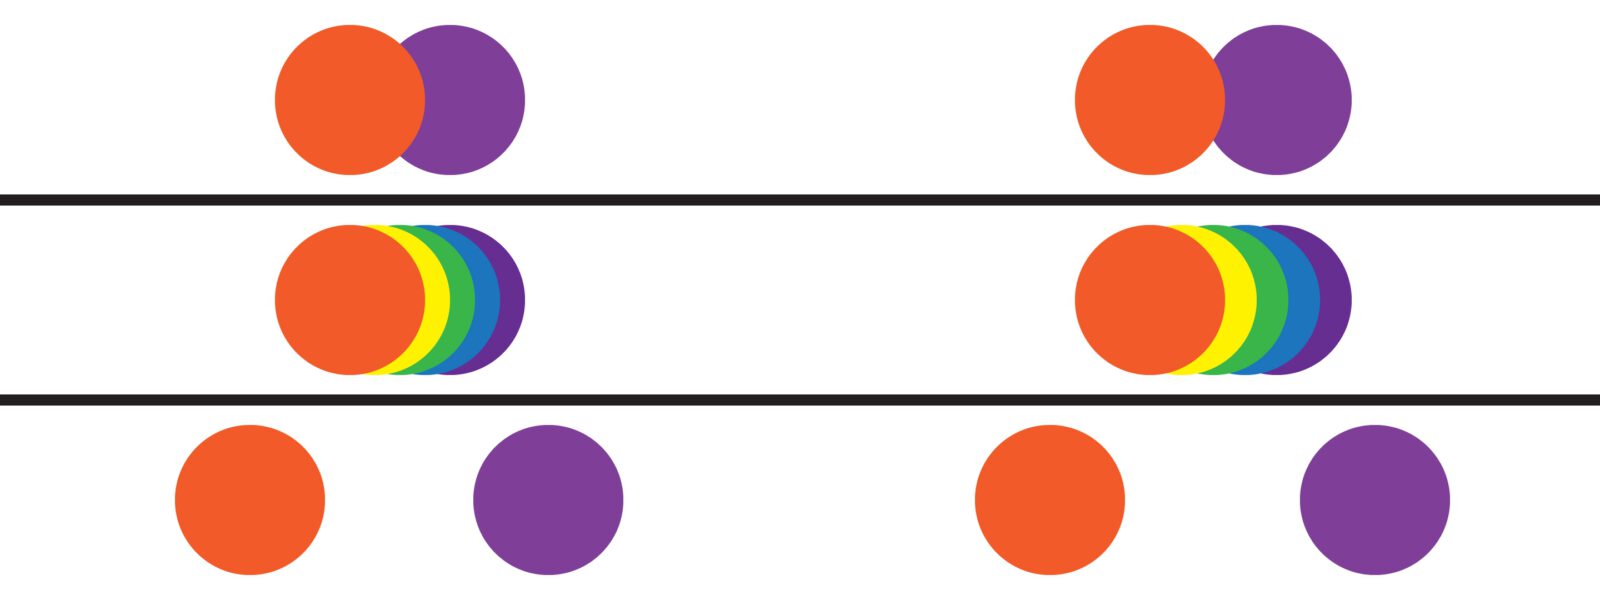
In the set of circles in the center, the orange and purple circles still have the same relative depth relationship. But, now there are three other circles in between them that act as stepping stones for my eyes, so that my gaze doesn’t have to shift suddenly from the foreground all the way to the background. I don’t find it at all unpleasant to view this set of circles.
In the bottom set, the total depth between the orange and purple circles is again the same as before. But, now they’re spaced farther apart horizontally. I don’t have any trouble viewing this set either, probably because my eye has enough time to readjust as it moves over the large blank space in between them.
The lesson of this is that it’s not just the total depth that determines how comfortable a stereo image is to view. The way that depth is distributed also plays a roll.
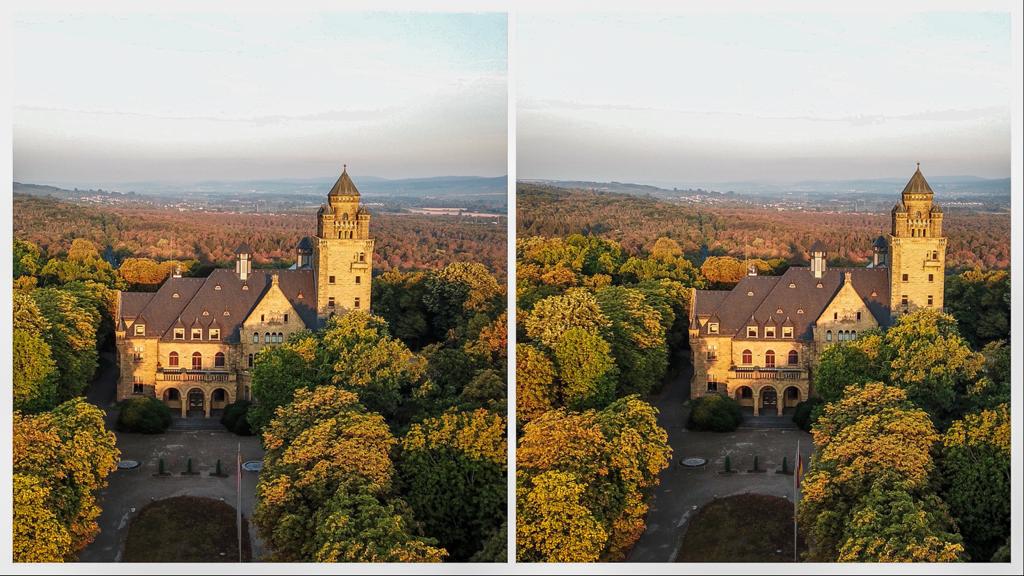
Let’s look at a real world example to see why this actually makes a difference. This photo, taken at the Royal Palace in Munich, has a huge amount of depth. But, I have no trouble or discomfort in viewing this image, because my eye is led gradually from the foreground to the background. It’s just like the second set of circles in my first image, where I had a bunch of stepping stones to allow my eye to make the transition from closest to farthest object.

The next photo of the flower also has a large amount of depth (too much!). But, the real problem is that it’s distributed like in the very first set of circles, with the closest object (the flower) right in front of the farthest object (the wall). Plus, there’s a distracting orange circle right next to the flower. For me, this background element competes with the foreground, and my eye keeps shifting between them without knowing where to rest. So, I find this less pleasant to view than the Munich Palace image.

So, the lesson is, don’t just think about the total depth in your image when you’re composing a photo. Also, consider how that depth is distributed and arranged. And, try to avoid jarring transitions from very close to very distant objects.
Get Creative
The discussion so far has mostly focused on viewing comfort. In other words, creating images that are easy to view in 3D. But, the depth of an image is also a creative tool. Baseline can be employed in an artistic way, to purposefully make things perceptually appear larger or smaller than they actually are, or to distort or exaggerate depth. For example, the next photo of the castle was taken with a fairly large baseline. Most people looking at this image will see the subject matter as “miniaturized.” Going in the opposite direction, it’s possible to take close-ups of flowers and insects at a very small baseline in order to make them appear gigantic.
Conclusion
Hopefully, you’re now aware that you need to control the overall amount of depth in your image to make it viewable. And, that you have two primary tools at your control to accomplish this – the baseline you use when you take the photograph, and the amount of subject depth you have in your composition. Plus, your viewing experience and comfort depend upon how you’re viewing the 3D image. And, finally, that adjusting baseline is also a creative tool you can use to achieve a specific perceptual effect.
It’s a lot to think about. But, don’t be paralyzed, trying to calculate or figure it all out before you take a 3D photo. The Stereo Sheriff isn’t going to arrest you if your results aren’t perfect. Just become aware of what you’re doing. In particular, the depth in your scene and the baseline you’re using. Could you move slightly or point the camera differently to include or exclude something close to you in your composition (like an overhanging tree branch)? These are the things you need to be aware of in 3D that aren’t an issue in flat photography.
Just play around with it and take note of your results. And, have fun!
David Kuntz (Rancho Palos Verdes, California, USA)
I started in 3D photography with a Stereo Realist camera in 1978, and have been an active member of the LA 3D Club (Stereo Club of Southern California) since 1980. I’m also part of the Support Panel of this website. If you would like to know more about me visit the Support Panel page.
Instagram-profile: hubbledoge